
Essential Gear for Home Music Production
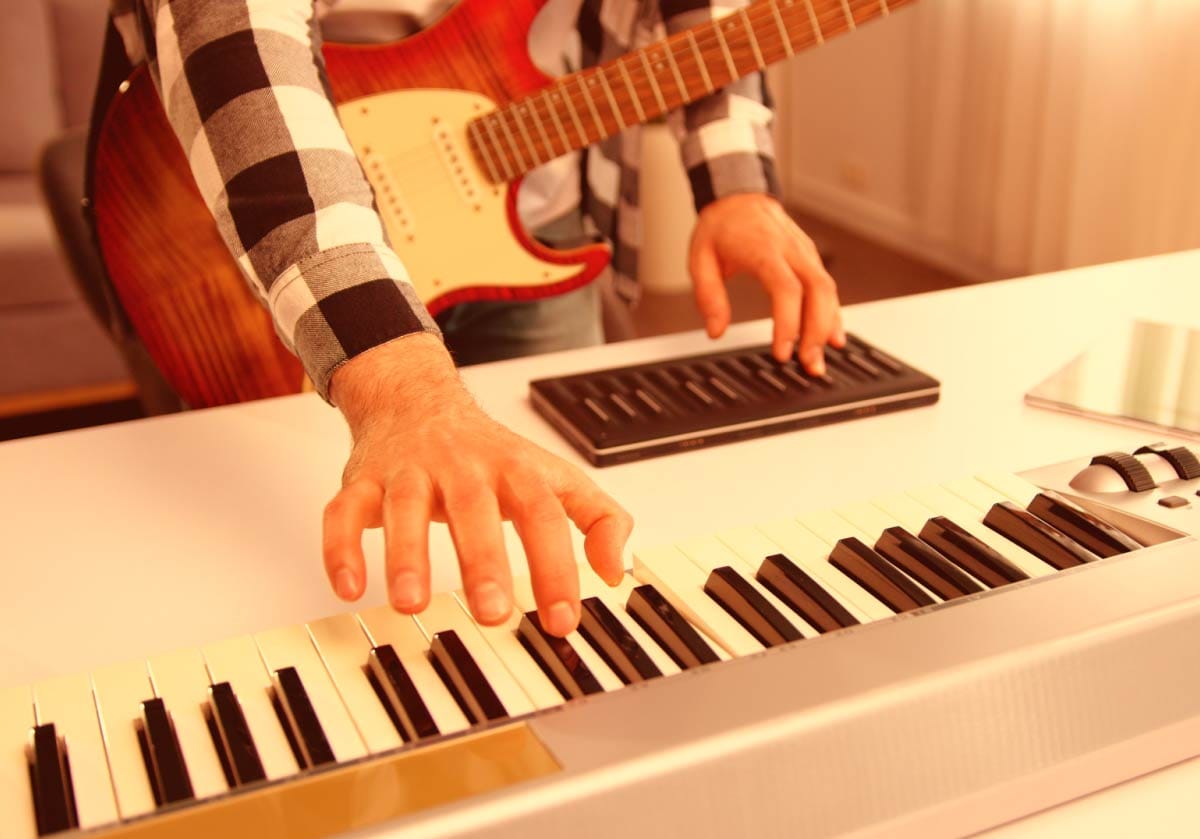
Look at All That Gear!
Building a home studio doesn’t require a room full of gear, expensive equipment, or a complicated setup. What you actually need is a small collection of tools that help you record clean audio, hear your music accurately, and interact with your DAW in a way that feels natural. Everything else is optional until you grow into it.
Let's face it - gear is a natural part of the beginner's roadmap to digital music production. And gear is sexy and mysterious. Gear is the first thing people look at when they come into a studio. It is the proverbial cover on the book.
But do you know what is more impressive? Making great sounding music. Have a great song and very few people are going to ask, "which piece of hardware did you use in that line?" So, let's stick with the basics for now.
The basics we cover in this guide walk you through the essential gear categories every beginner should understand: audio interfaces, microphones, headphones, monitors, MIDI controllers, and acoustic treatment. You’ll learn what each tool does, whether you need a piece of gear right away, how to choose the right version for your workflow, and which models offer the best value at different budgets.
By the end, you’ll know exactly what you need - and just as importantly, what you don’t need.
Prefer to watch or listen? Check out the video below, or continue reading below for the full deep-dive guide.
How to Choose an Audio Interface
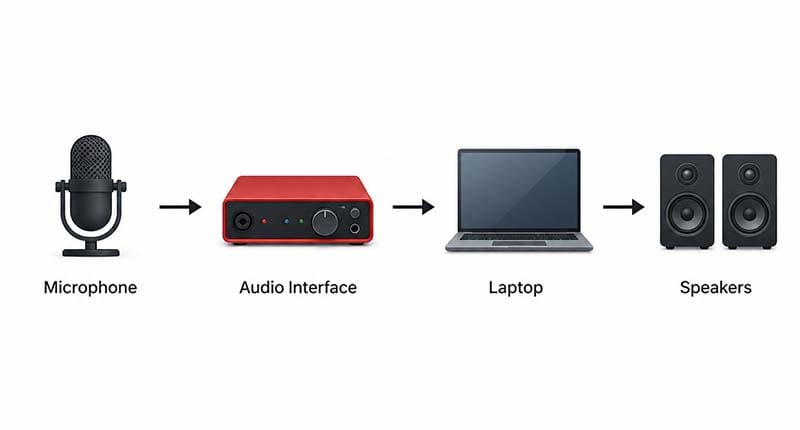
It is key to know that an audio interface is the heart of your home studio. It converts analog sound (microphones, instruments) into digital audio your computer can record, and it sends clean audio back out to your headphones or monitors so you can hear it. Choosing the right interface is easier than it seems once you understand the basics.
USB vs. Thunderbolt
For music producers, USB interfaces are perfect. They’re affordable, widely compatible, and fast enough for any home‑studio workflow. Thunderbolt interfaces offer lower latency and higher bandwidth, but they’re more expensive and only necessary for advanced setups with large track counts or heavy real‑time processing.
If you’re just starting out: Choose USB. It’s simple, reliable, and cost‑effective.
2-in/2-out vs. 4-in/4-out vs. Rack-Mounted
Your input/output needs depend on what you plan to record.
Are you looking to record a band's multiple instruments at the same time? A 2-in/2-out won't cut it.
Are you looking to record yourself singing and playing a guitar or keyboard? A 2-in/2-out could work great.
Let's take a look at some different options for audio interface 'sizes:'
2-in/2-out (2x2)
Ideal for new producers. Lets you record vocals, guitar, or a stereo instrument. Perfect for solo creators.
Takes the smallest amount of space and support both a vocal and instrument microphone coming in at the same time.
The inputs are usually coming in on the front of the unit.
Typically, this will be your least expensive option.
An example of a 2x2 interface is the Focusrite 2i2.
4-in/4-out (4x4)
Useful if you plan to record multiple microphones at once - duets, small ensembles, or multi‑mic instrument setups.
With four inputs, you have the ability to record four sources of audio at the same time. Have one singer, a guitarist, a bass player, and a keyboard player? Then four inputs would take care of all of those at a foundational level.
Want to add a drummer to the mix with multiple microphones? Then you would need an audio interface with more inputs.
These interfaces typically have some inputs on the front and the rest of the inputs on the back of the device, so they may not take up that much more space when compared to a 2x2 interface.
An example of a 4x4 interface is the Motu M4.
Rack-Mounted
Designed for advanced studios with many inputs, outboard gear, or complex routing. Not necessary for new music producers.
Why would someone want a rack-mounted interface?
Because these audio interfaces typically have a) more inputs and outputs, b) the ability to link multiple interfaces together for even more inputs and outputs, c) high clarity when it comes to analog-digital/digital-analog conversion, and d) more powerful amplifiers for speaker output.
An example of a rack-mounted interface is the PreSonus Quantum.
How Many Inputs do you Need?
If you are unsure about inputs, just look at what recording you would likely do. If the answer is between one and two microphones, then a 2x2 interface would cut it.
If you are going to regularly record most microphone sources, then consider a 4x4 or larger audio interface.
Note: If you do not plan on doing any recording, then you do not actually need an audio interface. While it could be used to power speakers, you could also just plug headphones right into your computer and get to work.
Preamp Quality
Preamps amplify your microphone signal. Having a preamp helps get your voice or instrument up to a working volume. But should you be worried about the preamp differences between interfaces?
Largely no. Modern interfaces - even budget ones - have excellent preamps that are clean, quiet, and transparent. It is highly unlikely that any new producer would be able to hear the difference between one preamp to another. Modern technology has made that happen.
You don’t need boutique preamps to make great recordings. Focus on interfaces known for reliable, noise‑free performance.
Typically, the number of inputs becomes more critical until you hit a more advanced stage with your skills and needs.
Latency
Latency is the delay between playing a sound and hearing it. This is nothing more than a lag in playback.
Why is There a Lag?
Because as your sound goes rushing through the electronics in the interface, it takes a little bit of time to get through as it travels through capacitors, resistors, transformers and the like.
The worse the lag, the harder it is to work with an interface.
Good interfaces minimize this delay, making recording feel natural. USB interfaces today offer excellent latency performance, especially when paired with proper buffer settings. At their low end, the lag might be less than 8 milliseconds (quite fast).
When Does Latency Matter?
Important Note: Latency is normally an issue when playing live. When recording, audio can be adjusted in the DAW to 'line up' the tracks with each other. If you are making electronic music entirely inside the DAW, this latency will not really affect you.
However, if you are all in-the-box and start dropping CPU-heavy plugins onto your track, then latency will rear its ugly head up once again. You might hit play and have half a second or more of a lag before you actually hear the audio. Your DAW's audio playhead will show that sound should be playing but it won't come out until it goes through all of that extra processing.
How to Handle In-The-Box Latency
When you start noticing the playback lag from latency when working in-the-box, here are some ways to handle it:
Adjust Buffer Size: The fastest way to deal with latency is to increase your buffer size. Remember, low buffer size = low recording latency / high CPU (great for recording), and high buffer size = high recording latency / low CPU (great for work with plugins, when recording latency is a non-issue).
Use Lower-Latency Plugins: Lower latency plugins can remove this kind of delay, although they are more commonly used in live music situations.
Bounce in Place: Instead of stacking up plugin after plugin, commit your changes by bouncing in place in your DAW. This freezes your track by rendering the output audio - your CPU does not have to keep making calculations on every playback and the latency goes away.
Use Dedicated DSP Hardware: Some hardware units can run plugins on the hardware itself, which frees up computer resources. This is a way to offload the processing tasks to dedicated 'workers.'
Once you have an idea of your needs when it comes to inputs/outputs and how you will be using your audio interface, then it is time to look at models that might fit your needs. Here are some links to starting audio interfaces that work well in a home music production environments:
Example Interface Models
Any of these will give you professional-quality results without killing your budget. Remember to fit your needs, assuming you need an interface in your setup.
USB Microphone vs. XLR Microphone
If you have no plans to use a microphone to record anything when making music, then skip this section if you want.
If you need a microphone because you are going to record vocals or an instrument, then this section is for you.
At a high-level, microphones come in two main connector categories for producers: USB and XLR. Each has strengths depending on your workflow.
USB Microphones
Pros/Cons
Pros: Affordable, plug-and-play, no interface required
Cons: Limited upgrade path, lower flexibility, often lower dynamic range
Use Cases
USB mics are great for beginners who want simplicity - podcasting, voiceovers, quick demos, or songwriting.
Price Ranges
USB microphones typically run in the $50-$150 range.
XLR Microphones
Pros/Cons
Pros: Higher audio quality, flexible, works with most any interface
Cons: Requires an audio interface, slightly higher cost
Use Cases
XLR mics are ideal for music production - vocals, instruments, and any situation where the sound quality needs to be higher.
XLR mics are ideal for music production - vocals, instruments, and any situation where the sound quality needs to be higher.
Price Ranges
Entry-level XLR microphones typically run between $99-$199.
Mid-range XLR microphones normally run between $200-$400.
And the upper end of XLR microphones can run up to $10,000 or more.
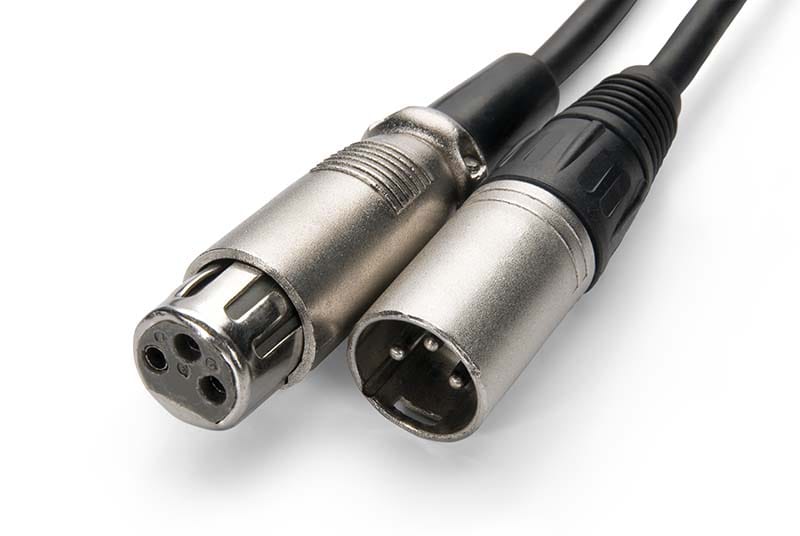
XLR Cable
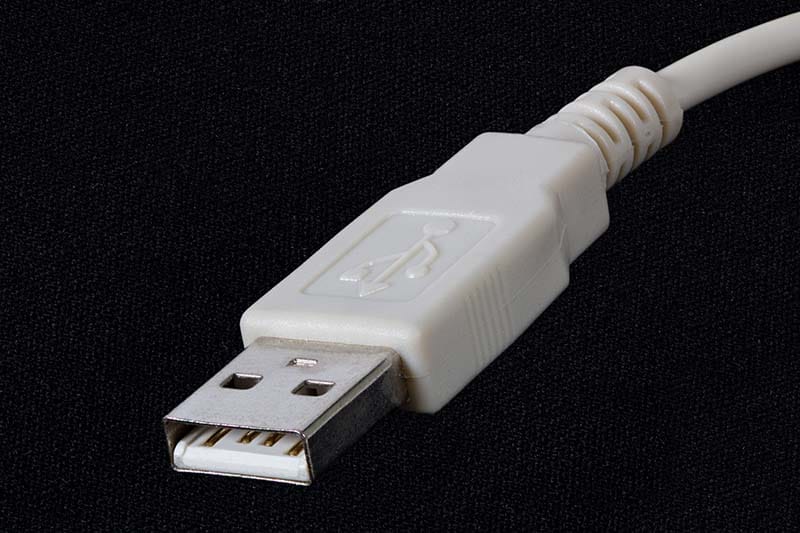
USB Cable
Producer Recommendations
You don't need expensive microphones to get clean results from your vocals. Sure, microphones that cost more may have a certain character to their sound, but to start, get something that records a nice clean sound.
Heck, there are hit records that were recorded with microphones that cost less than $200. Take Billie Eilish's Ocean Eyes, as an example.
Here are some microphones to consider for starting out:
USB Microphone Options:
Logitech Yeti (for spoken word)
XLR Microphone Options:
What are the Best Studio Headphones for Music Production?
When you are first starting out, headphones can be your best friend. A good set of headphones that can actually translate can carry you a long, long way - plus they are portable!
Sure, speakers are nice, but it is hard to beat the compact power of a good set of headphones for working in music.
But how do you select a good pair to work with?
Like with audio interfaces, that depends on what you are going to be doing in your studio.
Mixing vs. Tracking
When it comes to the outside casing of headphones, there are 'vented' or 'non-vented' options. These vents will let sound through the holes. Why have holes at all? Because having fully closed-back headphones (no vents) increases ear fatigue and does not properly represent the lower end of your music.
Closed-back headphones are the best for recording where microphones are involved. I remember putting open-backed headphones (vented) on one day to record some spoken word elements over music. When I played back the recording, the open-backed headphones had leaked out the music I was listening to and the microphone picked it up! That would not have happened with closed-back headphones.
Open-backed headphones are the best for mixing and mastering. The sense of space and low-end frequency representation is much better on headphones like these.
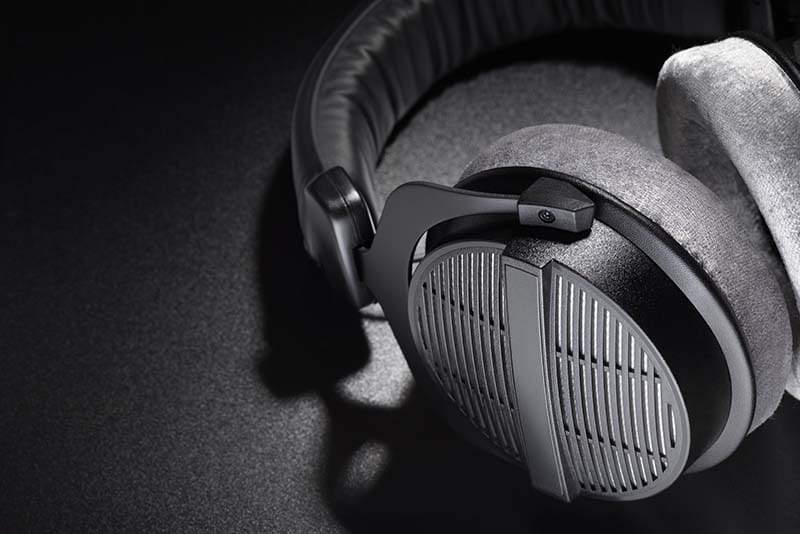
Open-back headphones
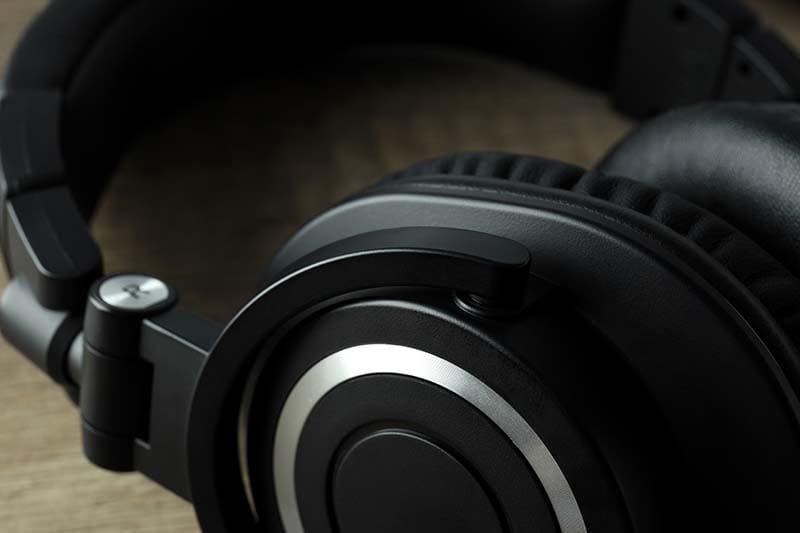
Closed-back headphones
Comfort
I remember the first nice set of headphones I bought when I was working with DJ equipment - a pair of closed-back, on-ear Sony cans. They sounded amazing! But because I wear glasses and those cans were pressing against my ears, they caused physical discomfort after a while.
If you are working on headphones without any speakers, there is a high chance that you will have those cans on your head for hours at a stretch. That means that comfort is going to be key for you to stay in the groove with the headphones on your head.
Designs have changed over the years since my Sony pair and now there are over-the-ear headphones that essentially put a ring of padding around your ear. These can be nice and soft, so be sure to test out headphones before you purchase them where possible.
You will want to look for:
soft ear pads - ideally over-the-ear (higher comfort = longer use sessions)
adjustable, padded headbands (make sure your cans fit your head well)
lightweight design (if those cans are heavy, your neck will feel it)
Frequency Response
Headphones create an 'alien' listening environment where sound is pumped directly into the holes in your ears from each side generally in isolation. This is definitely not how we hear sound in the normal world.
Combine that fact with the reality that the electronics and speakers in those headphones will favor some frequencies over others.
This means those 'bass-boosting' headphones you might own are not going to be doing you any favors in your music production. You end up hearing a lot of bass, so you turn the bass down in the mix only to have a flabby little mix when you play it in your car or on someone's speakers.
For the purpose of recording, does frequency matter? Not really - the headphone are not changing the pitch of the sound... just the volume of certain frequencies.
How much of a change are we talking about? The change could be 6-10 decibels or more! And these kinds of shifts can cause real problems in the mixing phase of the song-making process.
Accurate headphones help you make better musical decisions faster. Look for headphones that are balanced, clear, and not overly distorted in their frequency response curve.
Closed-Back Example Headphone Models
Open-Back Example Headphone Models
AKG K612 Pro
A Note about Higher-End Headphone Models
Can you work on the headphones in the above-list? Absolutely.
But will you end up purchasing additional headphones later? Definitely likely, especially if you get into mixing.
I am providing a list of some example higher-grade headphones here not because I am saying that you must get them, but rather because I have either personally or through music peers have direct exposure to their use and high quality levels.
If you are going down the headphone route and your budget allows for it, it may be worth taking a look at the following cans that are a step up:
Sennheiser HD650 - I have known people who love these cans and have used them for years. Comfortable and clean sounds from these.
Ollo Audio X1 - I own the Ollo S5X (the version before the X1) and I have never heard headphones that have been as naturally flat on the frequency response as these. Combined with an extremely comfortable feel when wearing, these are truly amazing. Note - the X1 open-backs is for mixing and the R1 closed-backs are for recording.
Headphone Correction Software
Remember that frequency response issue we talked about earlier? Well tools like dSoniq Realphones, Sonarworks SoundID or Waves NX can apply audio correction your headphone frequency response, making them more accurate for mixing.
Is it required to start? No.
Is it used in production? Not necessarily.
Does it help with mixing and mastering? Absolutely, although that is for later.
While is great to be hearing everything in a 'neutral' environment, you do not need to hit this perfectly if you are just starting out. However, it is important to have a pair of headphones that you can trust.
Studio Monitors
Studio monitors give you a more realistic picture of your music than headphones alone. After all, they exist in 3D space and send sound at us in a more realistic manner when compared to headphones.
However, they are not required on day one. They are a powerful upgrade once you’re comfortable in your DAW, but I know people who have made tremendous songs working just on headphones.
Room Size Matters
What does this mean? It means that if you buy some really big whomping speakers and throw them into a small room, you are going to cause yourself some sonic problems. Generally speaking, the smaller the room, the smaller the speakers needed.
If you have a small space and you are going to get studio monitors, you may not want some heavyweight speakers that will blow out the low-end in your room.
If you have a larger space, then there is some more flexibility here.
If you are working in a typical bedroom studio, 5-inch monitors may serve you the best.
In a larger room, either 8-inch monitors or some of the newer coaxial models like the IK Multimedia iLoud MTM monitors may serve you better.
Do I need a Subwoofer?
The smaller the drivers in your studio monitors, the less bass information they can generate. And that means that a subwoofer can be used to fill in that low-end information.
But do you need a subwoofer? Not necessarily.
Do you have a pair of headphones you can use to test the low-end? You could just use those to check the song as it progresses.
Are you in the mixing or mastering phase? Here is where a more accurate frequency spectrum becomes paramount. In this case, a sub can help (unless you have those headphones we just talked about).
So, need is likely a strong word here. If you are starting out, save that money for something that would be more critical when starting your studio.
Monitor Placement
Proper placement actually matters more than the price of your monitors. Why? Because of physics.
Now, don't worry - we aren't going to go all 'mathy' on you right now. I just mean that sound bounces around your room and hits your ears - the way it does this and what it hits along the way affects how you hear your music.
So, stick with these basics to get yourself into a good position with monitor placement:
If at all possible, try to form an equilateral triangle with your head. That means the distance between the speakers is the same as the distance between each speaker and your head.
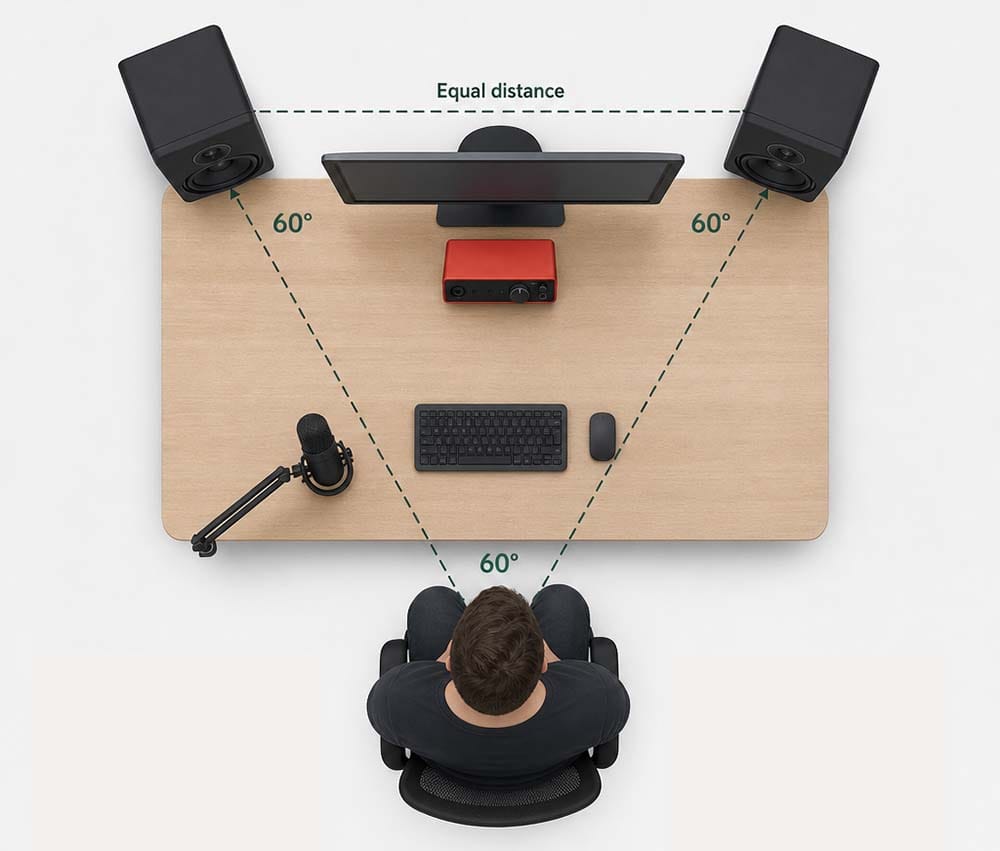
Ideally, keep the center of the speakers at your ear-level. Do not tip the speakers up or down to aim at your ears... instead use speaker stands to get them to the right height.
Avoid placing the speaker directly against the wall. You will need some room for the cables coming out of the back. If your speakers have ports on the rear, check with the manufacturer to find out how close they can be to a wall.
Once your monitors are in position, angle them in slightly so they are pointing just about at your ears.
Monitor Entry Budget Tier Examples
Monitor Mid Budget Tier Examples
Monitor Upper Budget Tier Examples
MIDI Controller
Have an idea in your head that you want to get into the computer? A MIDI controller is typically how you would make that happen. It helps you play instruments, create melodies, program drums, and interact with your DAW more naturally.
25-key vs 49-key (or more)
25-key controllers are portable, affordable, great for beats and electronic music
49-key controllers have more keys, and that means more keyboard with limited space for both hands - better if you need more room to work
61-key controllers have many keys, so if you are used to playing on a piano then this might be better for you - better if you want to have a piano-like experience
Pad Control Surfaces
Pad controllers do not use piano-like keys but instead have little square pads, allowing someone to play them like a drum machine of old. Except instead of the pads producing drum sounds, they can trigger and control whatever instrument you want.
These controllers are generally very portable and take up less total desk space than a piano-type MIDI controller. They are great for:
finger‑drumming
triggering samples
programming beats
Pads vs. Keys
Is there a right answer here? No - there is only your answer.
Keys are more expressive for melodies and chords. Pads are better for rhythm and beat‑making.
But many key-based MIDI controllers end up incorporating some kind of pads on them as well, creating a 'best of both worlds' experience.
No matter which way you go, make sure that the MIDI controller you choose has the ability to match your workflow. Don't know what your workflow is yet because you are just starting? No problem - perhaps check out some of these example controllers:
Acoustic Treatment: A Rundown
Acoustic treatment typically means covering different types of absorbers that will remove some of the sound bouncing around your room and messing with your hearing. Without a doubt, this area is one of the most misunderstood parts of setting up home studios.
This is not about making your studio soundproof - that means that sound would not enter or leave the room itself. Sure, that will help your neighbors if you are blasting some music, but that does not really change how sound behaves inside the room.
Treating your room acoustically is all about making your room sound accurate. And that becomes really, really important when you get further along in the song-making process.
Why does Acoustic Treatment Matter?
Have ever been inside a room in a house that had a strong echo? If you had a conversation in that room with another person, you would be struggling to clearly hear each other around the echo, right?
Well, that lack of clarity is what acoustic treatment is trying to fight against.
When your room is untreated, it can have:
boomy or tubby bass that mess with your low end
harsh reflections that mess with your high end
some frequencies that are much louder and others that are quiet
And all of that contributes to make your listening position a lie. That's right - a lie.
When you can hear accurately in your listening position, you can make musical decisions with confidence. That confidence will help you make better music faster.
So, what kind of treatment is important to consider?
Absorbers
Absorbers use a porous material to suck up the energy of the sound in the air, in a manner of speaking. Using these absorbers correctly can help to reduce that boomy bass which tends to build up in corners of the room. Absorbers also are great at eliminating first reflections.
Diffusion vs. Absorption
Absorption reduces reflections and controls echo by absorbing the energy of sound that hits it.
Diffusion scatters sound around and changes it from a solid wave into a 'smeared' wave.
If you are purchasing absorbers from a company that make them, diffusion panels are often an upsell point. Normally, these are not so necessary, but they look cool - buyer beware.
All of acoustic treatment relies on physics considerations for it to work properly. Diffusion magnifies that effect - only certain frequencies are affected and then only if the diffuser is at least a specific distance from the listener.
When you start, just focus on absorption. The goal at the start is not to get your room perfect, but to get it into a workable scenario.
By the way - if you are you just using headphones, you get to ignore all of this!
Cheap DIY Options
You might think that hanging some curtains or putting a mattress on the back wall or even setting up a bookshelf behind you is the way to handle acoustic treatment. Spoiler alert - it is not!
A bookshelf is not a diffuser - ignore diffusers right now and focus on absorption.
Your shiny reflective guitars or drums? Yeah - those reflect sound pretty harshly, so you might need to rearrange some stuff if you have those.
But if you want to look at some less expensive do-it-yourself kind of treatment, you can make a dent in your acoustic treatment with some of these methods:
Check out DIY absorber videos on YouTube
DIY absorber panels do not require a massive effort nor skill
Focus on high value areas like your front wall and room corners
Treat in stages - don't try to get everything in one shot
One more note on acoustic treatment - this stuff can be really frustrating at times. Know that this is a process and not a quick fix. If you want the quick fix method and want to pay someone to do it, you will be paying a lot of money. Keep that in mind.
Each improvement you make in the room will move you closer and closer to a pro-studio level listening experience, so keep the faith here.
(How about those headphones, you know? No acoustic treatment needed!)
Where to Go Next
This guide provided a clear understanding of the essential gear for home music production. We covered what each tool does, how to choose the right version, and how to avoid overspending.
Setting up a studio can sound like a major effort, but remember that all you really need is a computer, a mouse, headphones and a DAW to get working.
All the other gear like the interfaces, microphones, studio monitors, MIDI controllers, and acoustic treatment can be considered 'optional gear' when you start.
In time, you will see which of those, if any, you need to invest in. And thanks to this guide you are already prepared with base knowledge about all of those things.
Here are the next steps:
Choose the gear that fits your workflow
Build a simple, clean setup
Learn your tools really well
Upgrade only when your creativity demands it and your budget allows it
When you are ready to dive deeper, check out the guides below. Each one expands on a key aspect of the gear you need to make music on your computer.
Learn what an audio interface does, why it matters, and how it improves your recordings.
Stop guessing your low end. Find the best studio headphones for tracking and mixing that actually translate to the car test without breaking your budget.
Learn how studio monitors work, how to pick the right driver size for your room, and the setup mistakes to avoid so your mixes actually translate.
Discover if you actually need a MIDI controller, key vs. pad options, electronic drums, wind, and CC gear so you don't waste money.
A great home studio isn’t built from expensive gear. It’s built from clarity, intention, and consistent practice.
You’re building something real - and you’re doing it the right way.
Man, did we cover a lot of stuff in this guide. Several times, we talked about how some gear is important for different parts of the song-making process. But it helps to understand what the process actually looks like from beginning to end. Be sure to download the free 35-page Embervane Sparkflow Map to know how the gear mentioned in this guide fits into the overall process.
And when you’re tired of reading about gear and are ready go make some music, the MIDI Madness Tier 1 free course is waiting for you.
Go on - make something awesome.
Found this guide helpful?
Spread the word and share with another creator.
Return to The Roadmap to Digital Music Production Topic Hub
Previous Topic <
> Next Topic
About the Author

Jim is the creator of Embervane - a lifelong music maker with a curiosity‑driven approach to creativity and learning. He has been playing drums since age nine and composing seriously since 2018, continually refining his craft through study, experimentation, and hands‑on practice.
With a background in chemistry and more than two decades of studying behavioral psychology, Jim brings a unique blend of scientific thinking and human understanding to music education. He beta‑tests tools for companies like Mastering the Mix, Kit Plugins, and Soundiron, which keeps him close to the evolving landscape of modern production.
Jim isn’t a celebrity producer or award‑winning engineer - he’s a creator who remembers exactly what it feels like to struggle, learn, and grow. His mission is to help other music makers build clarity, confidence, and momentum in their craft.
Jim is the creator of Embervane - a lifelong music maker with a curiosity‑driven approach to creativity and learning. He has been playing drums since age nine and composing seriously since 2018, continually refining his craft through study, experimentation, and hands‑on practice.
With a background in chemistry and more than two decades of studying behavioral psychology, Jim brings a unique blend of scientific thinking and human understanding to music education. He beta‑tests tools for companies like Mastering the Mix, Kit Plugins, and Soundiron, which keeps him close to the evolving landscape of modern production.
Jim isn’t a celebrity producer or award‑winning engineer - he’s a creator who remembers exactly what it feels like to struggle, learn, and grow. His mission is to help other music makers build clarity, confidence, and momentum in their craft.


©2026 Embervane LLC. All rights reserved. Embervane™ is a trademark of Embervane LLC.