
Understanding Audio Interfaces: What They Do and Why They Matter
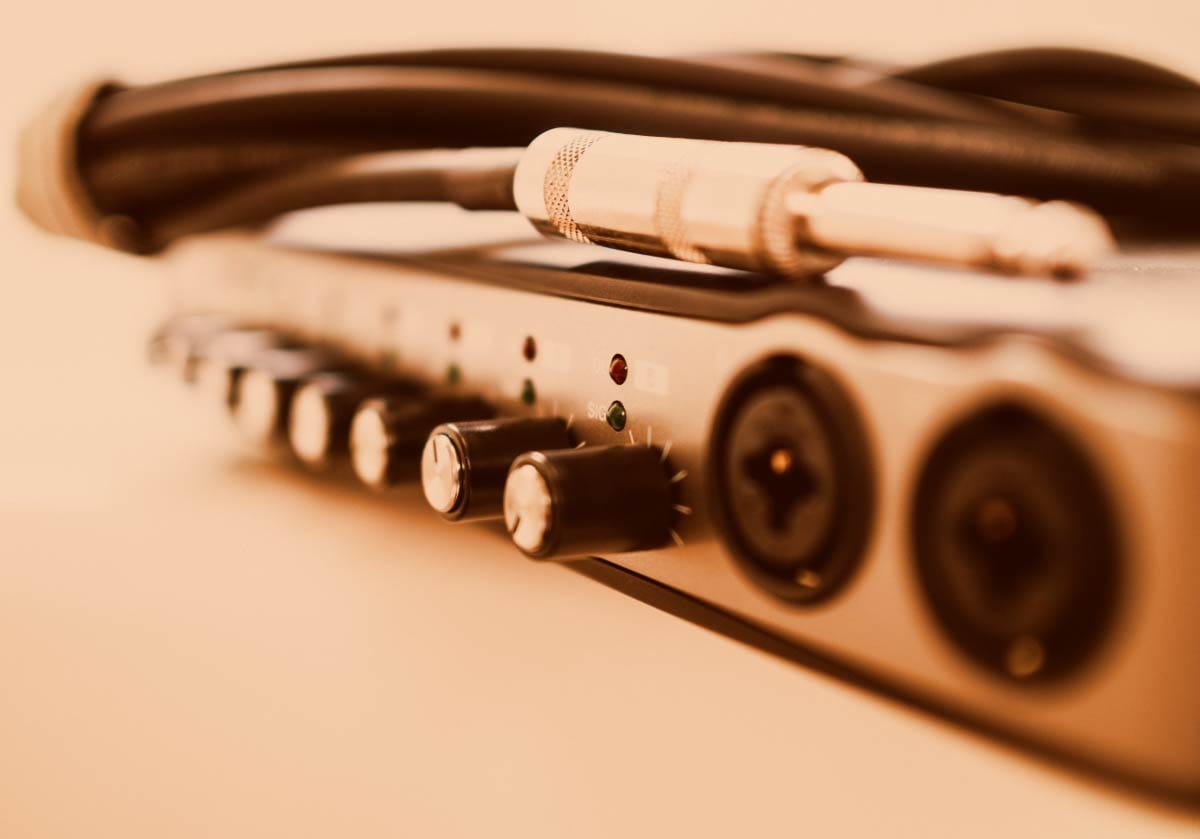
The Über Soundcard
If you’re new to music production, audio interfaces can feel mysterious - a box with knobs, inputs, and lights that everyone says you “need,” but few explain clearly. The truth is simple: an audio interface is the bridge between the real world and your computer. It’s the device that lets you record clean audio, hear your music accurately, and connect professional gear to your DAW.
If you are going to sing into a microphone and that vocal to be recorded into your DAW, an interface effectively translates the analog recording of your voice into the digital waveform you see in the DAW.
(It does more than that, but you'll find that out below.)
Anyone looking for the essential gear for home music production is going to run into people talking about audio interfaces (interfaces for short). So, it is a good idea to get a grasp on what they are all about.
This guide breaks down what interfaces actually do, how to choose the best one for you right now, how to understand their inputs and outputs, how to set them up properly, when you truly need one, and how to solve the most common problems producers run into.
By the end, you’ll understand audio interfaces at a level that makes your studio feel more capable - and your workflow more confident.
Let's get into it!
Prefer to watch or listen? Check out the video below, or continue reading below for the full deep-dive guide.
What an Audio Interface Actually Does
In the 'old days,' computers had sound cards that were something you physically purchased and needed to plug in or there would be no sound at all. But unlike the legendary Sound Blaster cards that were plugged directly into the motherboard, modern computer motherboards have had built-in sound cards on them for some time.
These soundcards don't look like cards at all - they are just a little jack on the back of your computer where you can plug your speakers in connected to some chips on the motherboard.
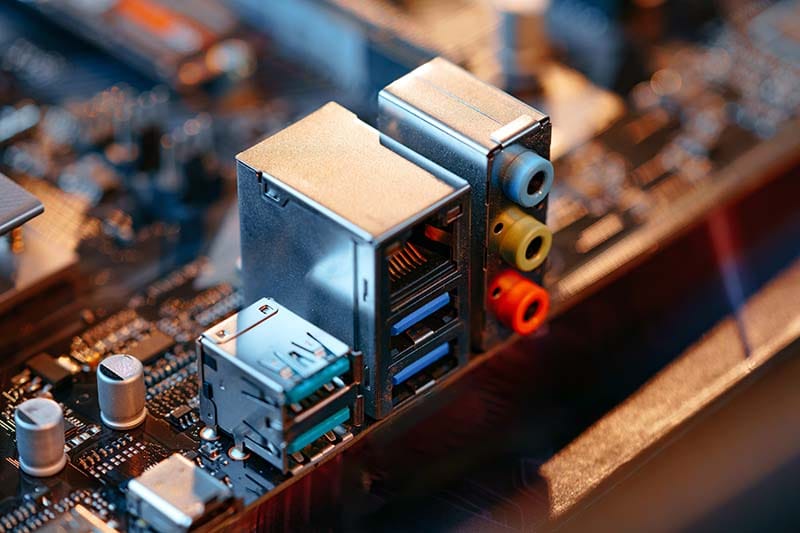
That kind of setup will work for most people, but not advanced music producers. When you up your music game, it becomes necessary to get a better sound card. And your audio interface is the replacement sound card that people who work in music operate with.
An audio interface performs a handful of essential tasks that your computer’s built‑in sound card simply can’t handle at a professional level. Things like recording cleanly, monitoring accurately, and providing a low-latency performance are the foundation of how an interface works.
AD/DA Conversion
AD/DA = ABBA?
No - no Swedish pop bands here. Instead, we are talking about Analog and Digital and how sound is converted between each version by your interface.
Audio interfaces convert sound in two different directions:
Analog > Digital (AD)
When you record vocals or instruments, the interface converts the analog sound waves into digital data that your DAW can understand and display for you.
It doesn't matter if you are recording a guitar, a piano, a full choir, a drum set, Mother Nature - whatever. If you are recording with a microphone, that signal is coming in with an analog format.
In order to work in your DAW, that signal needs to be converted to a digital format.
Digital > Analog (DA)
Going in the other direction, we have a digital source sound which then needs to be converted into an analog signal. Why? Because your headphones or studio monitors play analog signals and not ones and zeros.
When your DAW plays audio back so you can hear it, the interface converts that digital data into analog sound for your headphones or speakers and you hear sound.
The Challenge
Converting analog to digital may seem like a simple process, but it is actually pretty complicated. Why? Because analog has smooth shapes and the digital land of ones and zeros has very blocky shapes.
If a conversion is done poorly, it gets distorted as the smooth analog shapes get squared off and then interpreted back into 'smooth' shapes on the other end. Better converters mean clearer recordings, more accurate playback, and less noise.
An Inconvenient Reality?
But the truth is this - the AD/DA conversion level of modern interfaces are all so darn good that it gets really hard to actually hear the difference between different boxes today. For the new music producers, this is fantastic, as you get a higher-quality starting point right away.
Unless you are actually hearing an issue, you likely do not need to worry so much about this now or in the near future (or maybe at all).
Preamps
Microphones produce very quiet signals. Preamps amplify those signals cleanly before they reach your DAW. Good preamps are:
quiet
transparent
distortion‑free
capable of powering condenser mics with phantom power
Modern interfaces - even budget ones - have excellent preamps that can even outperform older studio gear. Why? Because technology advances, man - and that is good for us.
By the way, it is very true that smaller interfaces like the Scarlett 2i2 will not have as powerful of an amplifier as a rack-mounted interface like a Tascam US-16x08.
But the Tascam unit will be physically larger than the Scarlett, so pick your needs carefully.
Monitoring
Your interface can send audio out for monitoring (listening) to:
headphones
studio monitors
external speakers
This monitoring path is cleaner and more accurate than your computer’s headphone jack. It also allows for direct monitoring (hearing yourself with zero latency).
Latency
Latency is the delay between performing a sound and hearing it. Think of it like an echo - the higher the latency, the longer the delay before the echo gets back your ears.
I am sure you can imagine that if you were talking but heard a delay of your own voice talking back to at a second late, for instance, that it would be kind of hard to focus on what you were saying.
Interfaces reduce latency dramatically, making recording feel natural. Without an interface, latency becomes noticeable and frustrating - especially for vocals and instruments. (Remember that onboard sound card? Let's just say it does not have the best latency results.)
Attach Outboard Gear
One of the other things that an interface is really good at is connecting outboard gear - or gear that is outside of your interface or computer.
Let's imagine you had a hardware compressor and you wanted to run your vocals through it. How does the audio actually get to the compressor? It goes through the interface.
This graphic may look a little confusing, but it does map how something like that would work.
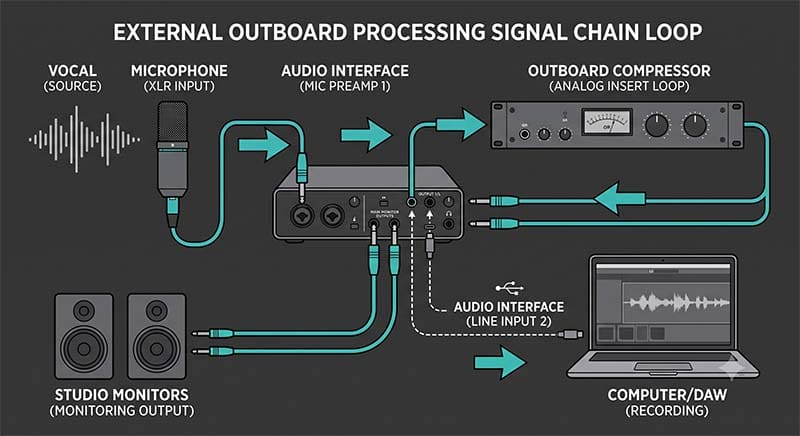
This is totally optional for new producers, but it can become more important for advanced studios. And I felt it was a good idea to at least understand at the fundamental level.
After all, if you wanted to connect a pile of external gear to your interface, that little Scarlett we talked about before won't cut it.
How to Choose the Right Audio Interface
Choosing the right audio interface isn’t about chasing specs or buying whatever a YouTuber recommends - it’s about matching the tool to the way you make music. An interface is the central hub of your studio. If your DAW is the software command center, your interface is the hardware command center.
When you choose well, your workflow feels effortless: vocals sound clear, instruments connect easily, latency stays low, and your DAW responds the way you expect. When you choose poorly, everything feels harder than it should.
The good news is that picking the right interface becomes simple once you understand the four core factors that actually matter: inputs, outputs, preamps, and features.
Input Types
Inputs determine what you can plug into your interface. Common input types include:
XLR for microphones
TRS for line‑level gear
Hi‑Z for guitars and bass
Combo jacks that accept both XLR and TRS (i.e., Neutrik)
Are you going to record with a microphone when making music? If no, then you may not need an interface with many inputs at all.
But if you are going to be singing and recording an instrument at the same time, then two inputs are required. (This is a typical singer-songwriter setup.)
If you are going to record a whole band, then start counting microphones and do the math, because you're going to need quite a few inputs.
Output Types
Outputs determine what you can connect the interface to:
headphones
studio monitors
external gear
multiple speaker sets
Most producers need a stereo headphone output at the minimum. Then, if you are using speakers, you will typically see two studio monitor outputs (one for L and one for R).
If you are going to use external gear, here is where additional inputs and outputs matter. The outboard compressor we talked about before - if it were a mono unit, it would require an additional out from the interface and an additional input so the sound could return to the computer after being processed.
Preamps
You may remember that I said that preamps in modern interfaces are all really clean compared to the years past. So, clarity is probably not going to be an issue.
However, the power of the amplifier does matter. If the interface cannot power your speakers or get your microphone input signal loud enough to be at a good recording level, then look for a different interface.
Finally, your microphones may require phantom power. This is a cool sounding thing that powers the microphone with +48V. Your microphone's manual will say whether or not it requires that phantom power. If it does, make sure your interface can provide it.
Interfaces from Focusrite, Audient, MOTU, and Presonus all offer excellent preamps, as do other companies.
Features
Interfaces can have some bells and whistles to them. Here are the ones that might matter:
direct monitoring
MIDI I/O
multiple headphone outputs
onboard DSP (Digital Signal Processing - for real‑time effects)
loopback (for streaming or podcasting)
High odds that you will not need any advanced features, but this gives you a sense of what is possible. As your skills grow, you may find yourself moving towards one of these.
Audio Interface Inputs and Outputs
Understanding the different ports on your interface helps you connect gear correctly and avoid distortion, noise, or weak signals. Lets go into a little more detail about the specific connectors and what they are used for.
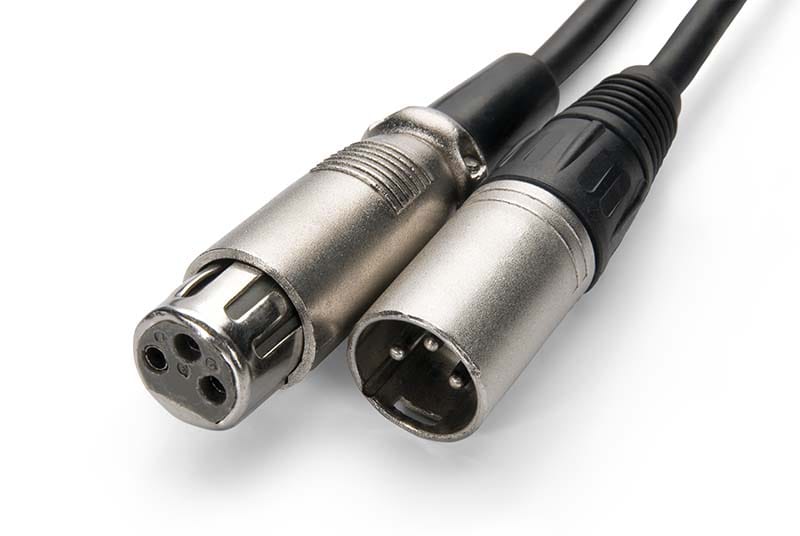
XLR
Primarily used for microphones on the input side of things. The signal is balanced, noise-resistant, and designed for low-level mic signals.
Can also be used for speakers on the output side.
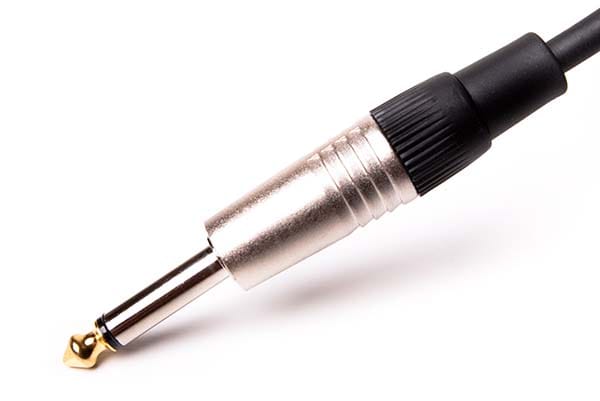
TRS
TRS stands for Tip-Ring-Sleeve. The Tip and the Sleeve are conductive while the ring is an insulator separating the two. Internally, one of the wires is attached to the tip and the other to the sleeve to create the signal path.
Side note: A TRS connector works with a mono signal. For stereo, you will see two rings, or a TRRS (tip-ring-ring-sleeve). If you look at your headphone cable, you are normally going to see a TRRS-type connector.
Here is what TRS is used for:
line‑level gear
studio monitors (some use TRS, some use XLR)
some instruments (like a guitar or keyboard cable)
Balanced TRS cables reduce noise over long distances. If you are running cables a long way, keep that in mind.
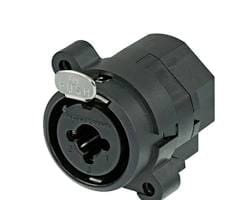
Neutrik
A combo jack that accepts both XLR and TRS. Most modern interfaces use these to save space and increase flexibility, so you typically see a couple inputs like this, especially on the front side.
Hi-Z
Z is the electrical symbol for Impedance. Hi-Z is a high-impedance input. These are used to manage direct-input signals correctly without distortion fro instruments like:
electric guitars
electric bass
certain pickups
Some interfaces will have specific Hi-Z inputs that are marked. Other interfaces may have a Hi-Z button that can be pressed. If you need this kind of input feature, be sure to check your interface manual or vendor website for more information.
Line vs. Instrument (vs. Mic?)
Line‑level, instrument‑level, and mic‑level signals aren’t interchangeable - each one carries a different strength and requires the correct input to sound clean.
Mic‑level signals are extremely quiet and need a preamp.
Instrument‑level signals are hotter and need a Hi‑Z input.
Line‑level signals are the strongest and are meant for synths, drum machines, and outboard gear.
Understanding these three levels prevents these gain staging problems:
Mic Level - very quiet, requires pre-amps
Instrument Level - louder, requires Hi-Z inputs
Line Level - strongest signal, used for synths, drum machines, and outboard gear
When you plug a signal into the wrong input, you get distortion, noise, weak recordings, or gain staging problems that make everything harder than it needs to be.
How to Set Up and Audio Interface
Setting up your interface properly ensures clean recordings, low latency, and stable performance.
Drivers
Because your interface is interfacing with your computer, your computer may need the correct drivers installed for everything to work.
If needed, install the manufacturer’s drivers. Drivers improve stability, reduce latency, and unlock full interface features.
Buffer Size
This is a super-important setting and one that gets forgotten a lot of the time. Save yourself the headache and remember this:
Low Buffer Size = Low Latency = High CPU Utlization (recording)
High Buffer Size = High Latency = Low CPU Utlization (mixing)
Here are some quick rule-of-thumb settings:
Low buffer (64–128 samples) Best for recording. Low latency, higher CPU usage.
High buffer (256–512+ samples) Best for mixing. Higher latency, lower CPU usage.
Switch buffers depending on your workflow. It is easy to either forget what your setting was or get confused if you are jumping between different stages of the music production workflow. Use our free Sparkflow Map resource to make sure you are staying on track to avoid frustration.
Sample Rate
The Sample Rate is how many actual samples of sound are taken in a recording per unit of time. The higher the sample rate, the more accurate the recording but also the larger the file size.
Common sample rates include:
44.1 kHz — standard for CD-based music
48 kHz — standard for video and modern music
96 kHz — optional for high‑resolution recording
At a simple level, cranking up the sample rate will require more horsepower from your computer. Stick with 48k and be fine here. You should not need to change this unless you are opening someone else's project at 44.1 kHz.
Do You Need an Audio Interface?
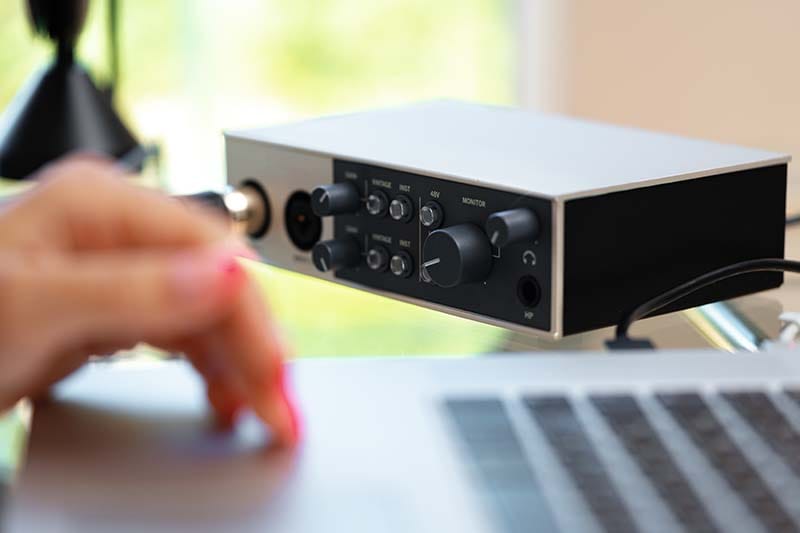
Most producers assume an audio interface is mandatory, but whether you actually need one depends entirely on how you make music. If you are going to be making beats from loops or focused on using a mouse or simple MIDI controller to make electronic music with your headphones, you may not need an interface.
But if you are going to be recording with a microphone, then an interface becomes pretty darn important. The interface will give you clean vocal recordings, proper instrument connections, accurate monitoring, and low‑latency performance.
But if you’re producing entirely 'inside the box' (on a computer) with virtual instruments or using a USB microphone, you can get surprisingly far without one.
The key is understanding what an interface unlocks, what problems it solves, and whether those problems exist in your workflow right now. All of this is how you build a productive music workflow.
When You Need One
You need an interface if you want to:
record live vocals
record live instruments
use XLR microphones
use studio monitors
reduce latency
connect outboard gear
improve audio quality
When You Don't
You don't need an interface if you're:
making beats
producing electronic music
using only virtual instruments
using a USB microphone
working entirely in headphones*
*Note: some higher-end headphones can require much more amplification to get the sound through them. If you plug your headphones into your computer and are having a hard time hearing the output sound even when the computer volume is cranked, you may want to consider an in-line headphone amplifier.
If you go this route, look for an in-line headphone amp that has its own power supply.
If you end up going with an interface, this step may not be needed.
Alternatives
Some alternatives to an audio interface include:
USB microphones
USB instruments
USB headphones
Built‑in computer audio (for beat‑making and some electronic music only)
Common Audio Interface Problems
Let's face it - technology is great but it doesn't always play nicely. There are a couple of low-level interface problems that happen - here is what to check to try and fix them quickly.
No Sound
No Sound coming out? Check these:
interface selected as input/output in computer
monitor volume (are your speakers turned up or on?)
headphone volume
DAW track routing (are the master bus meter showing audio coming out?)
muted tracks
cables connected correctly
Latency
Is the latency messed up? Try checking these items:
lowering buffer size (low buffer = low latency = high CPU)
using direct monitoring
closing background apps
updating drivers
Mic Not Working
No sound being recorded through the microphone? Check these:
phantom power on? (for condenser mics - check your manual)
correct input selected
gain level (this is the input volume of the microphone signal on the interface)
cable connection
mic type vs input type
is your interface showing a signal when you are talking into the mic?
Mic Not Working
Ugly distortion kicking up? Here is where to start:
gain too high (this can drive the signal too hot into the next stage)
clipping (clip here or clip there, it's all clipping to our ears)
wrong input level (line vs instrument vs mic)
faulty cables (wiggle the cable - does it get better/worse?)
Driver Issues
If you are getting some kind of driver issue notification, try this:
reinstalling drivers
updating firmware
switching USB ports
avoiding running interface through USB hubs - connect direct!
Frequently Asked Questions
Can I plug regular computer speakers into my audio interface?
While you can sometimes use adapters to plug consumer speakers into a headphone jack, audio interfaces are specifically designed to output to proper studio monitors. Using balanced TRS or XLR cables to connect your interface to studio monitors ensures you get a clean, flat, and accurate representation of your mix without the artificial bass or treble boosts that standard computer speakers add.
Should I buy an interface with lots of inputs just in case I need them later?
Not necessarily. Buying a massive 8- or 16-input rack-mounted interface before you actually own the microphones and outboard gear to plug into it is a classic studio money trap. If you are a solo producer, beatmaker, or singer-songwriter, a high-quality 2-input interface is more than enough to get started. You can always expand your studio setup when your actual recording needs outgrow your current hardware.
Will buying a better audio interface make my songs sound better?
An interface will make your recordings mathematically cleaner and your playback more accurate, but it won't write the music for you. High-end converters only capture what you put into them. If your tracks aren't hitting the way you want them to, step away from the hardware specs for a moment and focus on the fundamentals of how to write a song and structure a compelling arrangement.
One caution here: if you are using headphones for music production and you find that your current interface has the volume cranked to near max and the volume still is not loud enough, then that is a sign that you may need a better amplifier in your interface and an upgrade could give you more amp headroom, which can clean up the sound you hear a bit.
Do I need an audio interface if I only use MIDI keyboards?
If you work entirely "inside the box," meaning you only use virtual instruments, draw in notes with a mouse, or are using a MIDI controller, then you can get away without one for a while. However, as your projects get larger, an interface becomes highly recommended to lower your buffer size and eliminate the latency delay between pressing a key on your MIDI controller and hearing the sound in your headphones.
Where to Go Next
We dove deeply here into the world of audio interfaces. We talked about what they are, how they work, how you choose one and even how you troubleshoot common problems with them.
A great studio starts with clarity - and now you have it.
The interface is the hardware command center for your music operation, but it is only one piece of the entire music making process. By understanding the whole picture from idea to finished song, you can gain a much better sense of when how your studio can grow over time. Download the substantial free Embervane Sparkflow Map resource and lock in this knowledge for yourself.
Then, when you need to stop thinking about gear and start making some music, you can dive into the free MIDI Madness Tier 1 course.
Oh, yeah - it's music time!
Found this guide helpful?
Spread the word and share with another creator.
Return to Essential Gear for Home Music Production Topic Hub
About the Author

Jim is the creator of Embervane - a lifelong music maker with a curiosity‑driven approach to creativity and learning. He has been playing drums since age nine and composing seriously since 2018, continually refining his craft through study, experimentation, and hands‑on practice.
With a background in chemistry and more than two decades of studying behavioral psychology, Jim brings a unique blend of scientific thinking and human understanding to music education. He beta‑tests tools for companies like Mastering the Mix, Kit Plugins, and Soundiron, which keeps him close to the evolving landscape of modern production.
Jim isn’t a celebrity producer or award‑winning engineer - he’s a creator who remembers exactly what it feels like to struggle, learn, and grow. His mission is to help other music makers build clarity, confidence, and momentum in their craft.
Jim is the creator of Embervane - a lifelong music maker with a curiosity‑driven approach to creativity and learning. He has been playing drums since age nine and composing seriously since 2018, continually refining his craft through study, experimentation, and hands‑on practice.
With a background in chemistry and more than two decades of studying behavioral psychology, Jim brings a unique blend of scientific thinking and human understanding to music education. He beta‑tests tools for companies like Mastering the Mix, Kit Plugins, and Soundiron, which keeps him close to the evolving landscape of modern production.
Jim isn’t a celebrity producer or award‑winning engineer - he’s a creator who remembers exactly what it feels like to struggle, learn, and grow. His mission is to help other music makers build clarity, confidence, and momentum in their craft.


©2026 Embervane LLC. All rights reserved. Embervane™ is a trademark of Embervane LLC.