
Audio Compression Explained: A Complete Guide to Dynamics Processing
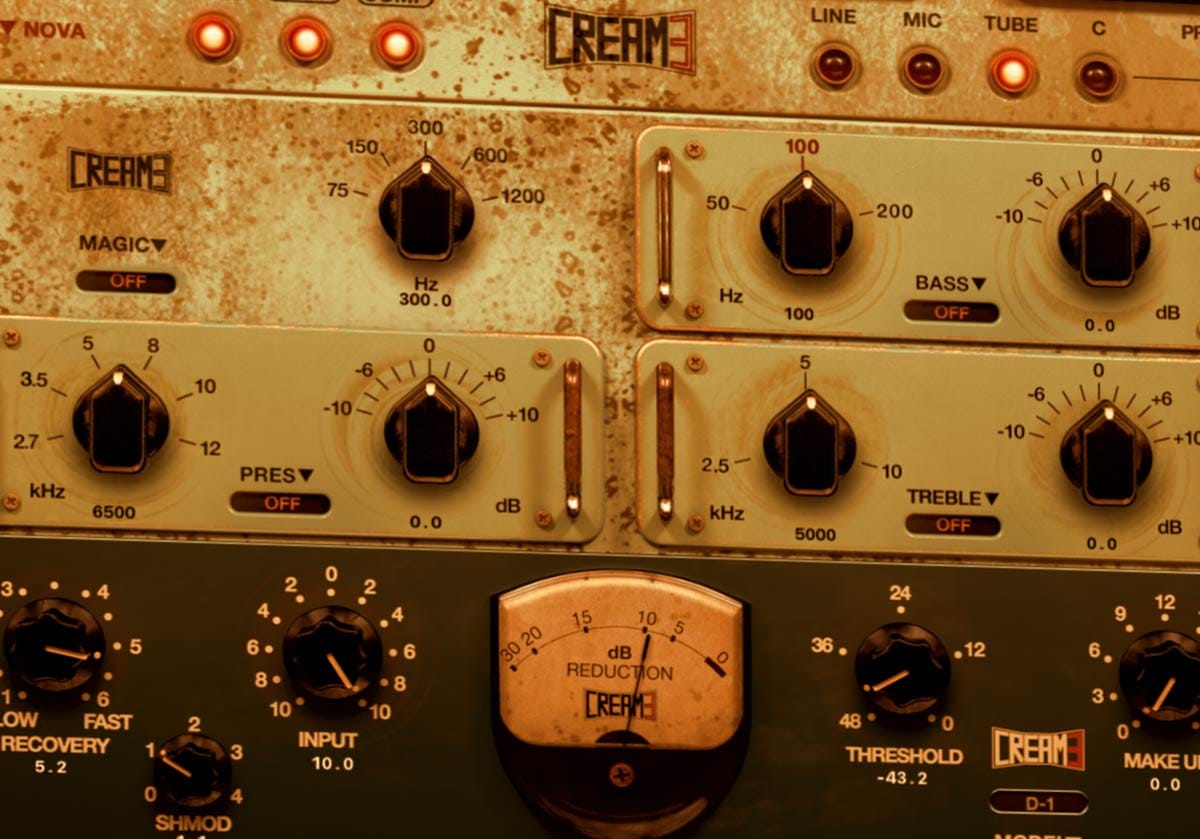
Plugin interface shown: Cream3 by Acustica Audio
Squeeze Me Good!
Drop a beginner into a Digital Audio Workstation (DAW), open up a compressor plugin, and watch what happens. They turn a few knobs, watch a needle jump back and forth, and tweak settings until the track gets louder or quieter. But if you ask them what they are actually listening for, you will usually get a blank stare.
That is because dynamic processing is one of the most misunderstood areas when building foundational skills in plugins and processing. Most tutorials start by throwing technical definitions at you - circuitry types, ratios, gain reduction - before you even know what a compressed signal sounds like in a dense mix.
Let's clear all that out of the way. Learning how to hear compression - and knowing why you are reaching for it - is infinitely more important than memorizing where to set your knobs. Once your ears understand what compression does to energy, rhythm, and depth, the technical controls fall into place effortlessly.
It's time to squeeze some audio!
Hearing Compression: The Mindset Before the Knobs
Most producers reach for a compressor because they think they are supposed to. They saw a video where someone put an 1176 on a vocal or an SSL Bus Compressor on the drum group, so they copy the preset and move on.
Before touching a single dial, you need to change your mental framework. Compression is not a volume knob; it is an automatic energy shaper.
Dynamic Processing
Groove Control
Leveling Control
Rhythmic Elements (Drum/Bass)
Shapes attack transients
Times release to song BPM
Creates "bounce" and movement
Lead Elements (Vocals/Solos)
Smooths out volume peaks
Pins performance upfront
Maintains focal consistency
Why "How to Hear It" Beats "How to Use It"
The hardest part of learning compression is that bad compression doesn't always sound visually "broken." If an EQ is set wrong, a track sounds muddy or piercing. If a reverb is set wrong, a track sounds washed out. But if a compressor is set wrong, the track usually just sounds dead, flat, or choked - and beginners struggle to identify why their mix lost its life.
To hear compression, stop listening to the peak volume. Instead, train your ears to focus on two distinct characteristics:
The Tail (Body & Sustain): How long does the quiet sustain hang around after the initial hit? Are the quieter parts more obvious after compression?
The Impact (Front Edge): How sharp or soft is the initial hit of the instrument? Does the hit feel more or less powerful overall?
When you compress a sound, you are altering the ratio between that initial impact and the trailing sustain. Learning to hear that relationship change is the key to mastering dynamic control.
To train your ears on these exact A/B differences in real time, watch the video breakdown below:
The Two Core Jobs: Groove Control vs. Leveling Control
Every time you open a dynamic processor, you are using it for one of two core reasons: Groove Control or Leveling Control.
Groove Control (Rhythmic Elements): Used on drums, percussion, slap bass, and rhythm guitars. Here, you use the compressor to clamp down on or emphasize the initial snap of a hit, timing the release of the compressor so it pumps in sync with the song's tempo to accentuate the natural pocket of the performance.
Leveling Control (Lead Elements): Used on lead vocals, bass guitars, lead synths, and solos. Here, the goal is consistency - you are knocking down the loud notes and pulling up the quiet ones so the track sits pinned at a steady level in the mix, never getting buried by the instrumental or poking out unnaturally.
Creating the Bounce: Anchor Points and Body Movement
When a mix works, listeners don't just hear the music - they feel a physical impulse to move their head or tap their feet. That physical reaction is driven by dynamic contrast, and great songs have this dialed in tightly.
Compressors allow you to sculpt focal points in a song. By controlling how the rhythm section breathes, you create an anchor point for the listener's ear. A drum bus that breathes in quarter-note or eighth-note rhythms gives the song its "bounce."
If you over-compress, you kill the bounce, leaving a static wall of sound. If you under-compress, the instruments fight for attention and don't 'stay in place' on the soundstage, causing the listener's ear to jump around frantically.
Compression places every instrument in a dedicated physical space, which will make it much easier to use spatial processing to position these same instruments from front to back on the soundstage.
What is Dynamic Range Compression?
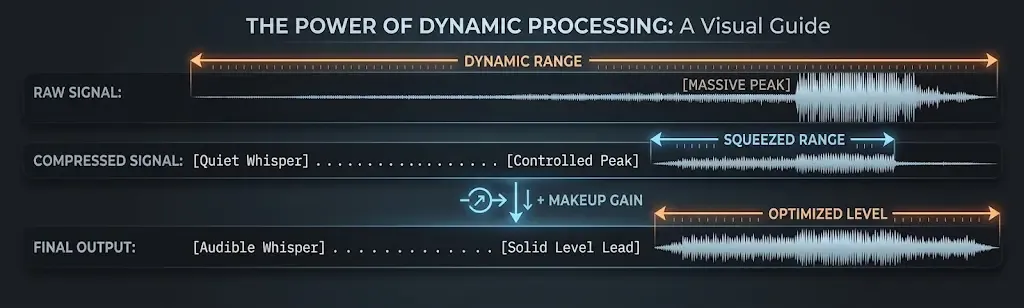
At its most fundamental level, dynamic range is the difference between the quietest part of an audio signal and the loudest part.
In an untreated recording - say, a vocal performance - the singer might whisper during the verse and scream during the chorus. That raw audio signal has a massive dynamic range. If you turn the track up so the whisper is audible, the chorus will distort your speakers. If you turn it down so the chorus fits, the verse vanishes.
The History of Compression
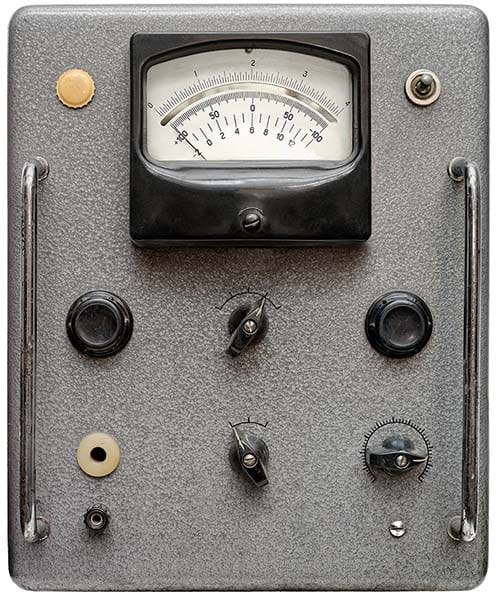
The history of compression dates back to the earlier days of radio broadcasting. We are talking almost 100 years, when the Western Electric 110A Program Amplifier (released in 1937) became the first commercially available broadcast‑specific compressor.
Back then, on AM radio, there were issues if the signal hit the broadcasting equipment too hot - it would cause distortion or damage equipment. To prevent these signal spikes from causing issues, leveling control was needed -enter the compressor!
From there, compressors made their way into music studios with very similar leveling control needs - ensuring that when the vinyl masters were physically cut, the lathe needle wouldn't bounce out of the cutting groove.
Fun Fact: Compressors had been out earlier, like the Telefunken U3 (1936) but the use was for telephone PA systems instead of broadcasting.
Defining Dynamic Range in Music Production
In modern music production, dynamic range needs to be handled carefully. The more dynamic, the more exciting, but the greater the risk that the soundstage is not stable. This creates a gap between leveled control and rhythmic groove.
Dynamic range compression reduces that gap. It automatically turns down the loudest peaks (attenuation) so you can bring up the overall volume of the entire signal (makeup gain) without clipping.
Remember that the purpose of leveling control is to manage high crest factor (the peak-to-average ratio) and lessen the dynamic range to a point where the lead element sits consistently in the mix.
A smaller dynamic range combined with a good average loudness draws a listener's attention to focus on that sound. Humans focus on sounds that have a louder average sound (like what we want from our lead vocal), and compressors make that happen.
To learn how to hear high crest factor sounds and use compression for leveling control, watch the video breakdown below:
The Dynamic Processing Toolkit: Compression, Limiters, Clippers, and Transient Shapers
While "compression" is used as a catch-all term, dynamic processing actually includes a family of specialized tools designed to manage signal levels, transients, and frequency balance.
The dynamic processing toolkit relies on six specialized tools:
Compressors: These reduce dynamic range by turning down signals that cross a specified threshold. Make-up gain can raise the processed signal to previous levels.
Limiters: These are basically compressors set to extreme ratio settings (10:1 - 20:1 or higher) to set an absolute ceiling on peak audio levels to prevent clipping and maximize loudness.
Clippers (Hard & Soft): These ruthlessly and efficiently 'chop' the top of peaks off past a threshold to manage dynamic range and add subtle harmonic saturation - with soft clippers introduce a smoother, warmer character.
Transient Shapers: These tools adjust the attack and sustain of a sound, manipulating the envelope in a different manner than a compressor.
Expanders/Gates: These are downward dynamic processors - the inverse of compressors. Expanders make quiet sounds quieter (increasing dynamic range) while gates eliminate audio signals falling below a set threshold (commonly used to eliminate mic bleed on drum tracks, for instance).
De-Essers: These are frequency-specific compressors - typically targeting higher frequencies (4 kHz to 10 kHz) to tame harsh vocal sibilance.
The Anatomy of a Compressor: The Core Controls
While different plugin interfaces can look dramatically different, almost every standard compressor relies on six main parameters:
Threshold: Where it starts to activate (clamping down on the peaks).
Knee: How gently or quickly the compression kicks in near the threshold.
Ratio: How hard the signal is getting squeezed.
Attack: How fast the compressor gets to full compression.
Release: How fast the compressor stops compressing when the audio signal drops below the threshold.
Make-Up Gain: Restores the lost volume to the audio signal.
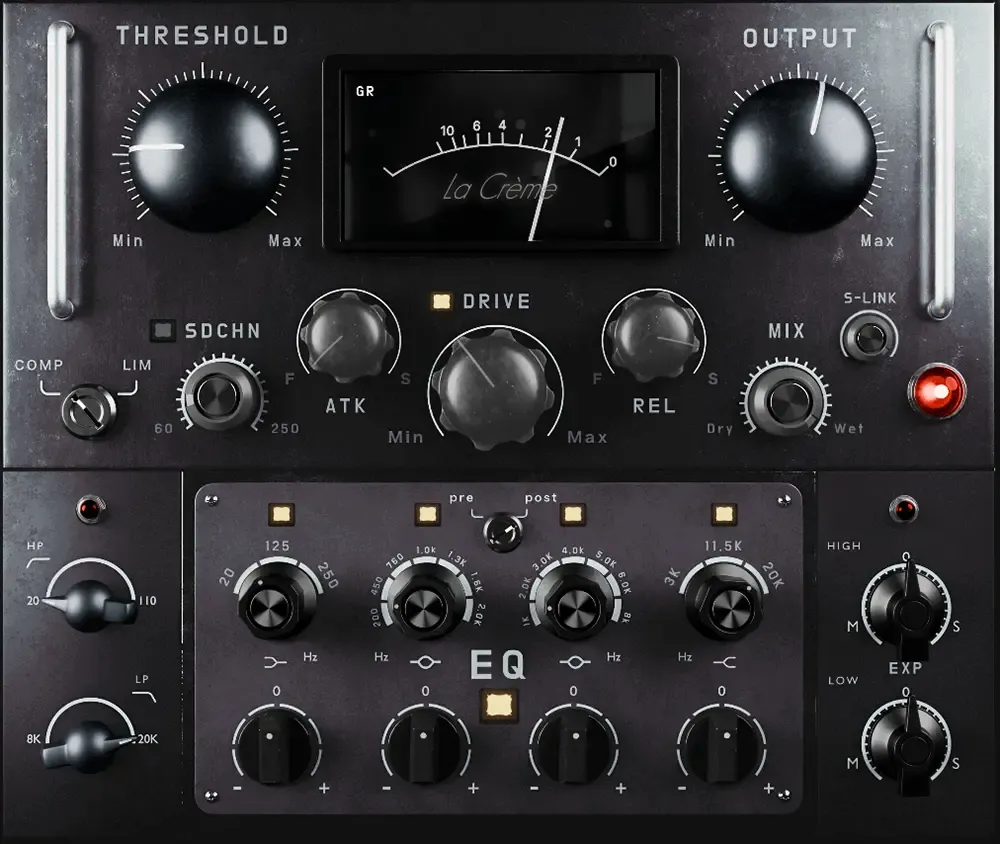
Plugin interface shown: La Crème 3 by Tone Empire
Threshold: Setting the Ceiling
The threshold (measured in decibels, dB) is the line in the sand. Any part of the audio signal that stays below the threshold is left completely untouched. The moment the signal crosses above the threshold, the compressor engages and begins turning down the volume.
Rule of Thumb: When you cross the line (threshold), you get compressed!
Ratio: Controlling the Squeeze
The ratio determines how much reduction is applied once the signal crosses the threshold. It is expressed as a proportion (e.g., 2:1, 4:1, 20:1):
2:1 Ratio (Mild compression): Gentle, transparent control. For every 2 dB the signal goes over the threshold, only 1 dB comes out.
4:1 Ratio (Moderate Compression): Punchy, controlled dynamics. For every 4 dB over the threshold, only 1 dB comes out.
20:1 Ratio to ∞:1 (Extreme compression / Limiting): The signal is effectively blocked from exceeding the threshold.
All those numbers are technically correct, but don't get mired up in them. Think of ratio like the size of the hammer that is hitting the sound. Is it a little hammer (1.5:1 ratio) trying to tame those peaks or is it a whomping cartoon sledgehammer (20:1 ratio)?
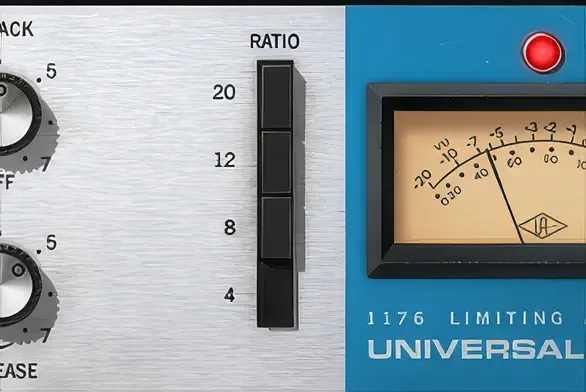
Plugin interface shown: Universal Audio 1176 Rev A
Attack: Shaping Transients and Punch
Attack (measured in milliseconds, ms) dictates how quickly the compressor reacts once the audio crosses the threshold.
Fast Attack (0.1 ms – 1 ms): Grabs the initial transient strike instantly. Great for taming spiky peaks, but over-using a fast attack on drums will crush the snap, leaving the track sounding dull and pushed into the background.
Slow Attack (10 ms – 50 ms): Allows the initial transient hit to slip through uncompressed before the clamping action begins. This accentuates the initial punch of kick drums, snares, and picked guitars.
Don't get caught in the numbers - instead listen to the difference of a fast attack and a slow attack on the same raw audio material and get a sense of how they sound different to lock in what the faster vs. slower attack can do for you creatively.
Listen to how different attack settings alter the initial punch of the audio:
Raw Audio:
Listen to the natural sound of the uncompressed dynamics.
Fast Attack:
Listen to how the compressor clamps down on the initial transient of the very first note, keeping the volume even across the clip.
Slow Attack:
Listen to how the compressor lets the start of some of the notes through as it takes a moment to engage. The slower attack time delays full gain reduction, preserving the hit's punch.
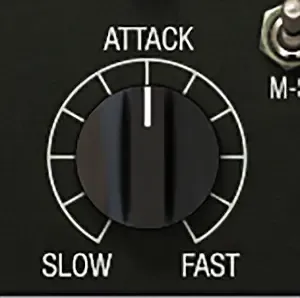
Plugin interface shown: Manley Variable Mu Compressor by Universal Audio
Release: Setting the Rhythm and Groove
Release (measured in milliseconds or seconds) dictates how long it takes for the compressor to return to its resting state after the signal drops back below the threshold.
Fast Release (10 ms – 100 ms): The compressor lets go immediately. This brings up quiet background details and room ambiance, but if set too fast, it causes unnatural volume flutter known as "pumping."
Slow Release (300 ms – 1000+ ms): Smooths out the performance, maintaining a steady squeeze. If set too slow, the compressor never lets go before the next note hits, permanently squashing the performance.
Auto Release: A dynamic setting that automatically adjusts release times based on incoming audio transients - while this can work for complex material like lead vocals or mix buses, care must be taken when using the 'auto' setting.
With all of these settings, remember that the numbers are not the important part. But hearing and understanding the envelope effect of the compressor is.
Listen to how release settings affect the tail and rhythm of the track:
Raw Audio:
Listen to the natural sound of the uncompressed dynamics.
Faster Release:
Listen to how the volume changes after the initial hit - the compressor clamps down but releases quickly, creating a distinct 'pumping' in volume.
Slower Release:
Listen how the volume drops after the initial notes - the compressor clamps down and the volume stays quieter for the rest of the audio because the longer release doesn't let the gain reduction return to 0 dB.
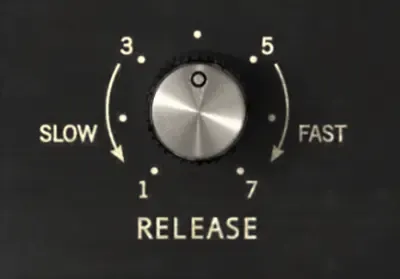
Plugin interface shown: Comp FET-76 by Arturia.
Note that 1176-style controls are reversed: 1 is the slowest setting and 7 is the fastest.
Knee, Makeup Gain, and Sidechain Routing
There are some other settings that are important to compression as a whole, but may not be available in all compressors. However, these three settings are important to dialing your audio compression settings in:
Knee: Can be hard or soft - how sharply the threshold responds to sounds crossing that line.
Makeup Gain: The amplifier at the end of the compressor circuitry that brings the level back up to neutral after compression 'turns the volume down.'
Sidechain Routing: Allows a compressor on one track to be triggered by the sound on another track.
The Knee (Hard vs. Soft)
The knee parameter controls how abruptly the compressor transitions into gain reduction as an audio signal crosses the threshold. A hard knee applies the full target ratio the exact millisecond the signal steps over the line, creating an immediate, aggressive clamping action. Conversely, a soft knee introduces a transitional curve, gradually applying gain reduction as the signal approaches the threshold for a much smoother response.
You will typically choose a hard knee when dealing with spiky, transient-heavy material where aggressive control is required - like snare drums, percussion, or master bus limiting. A soft knee is ideal when transparent, invisible leveling is the goal, making it the preferred choice for lead vocals, acoustic guitars, and smooth string sections where an abrupt shift in dynamic processing would sound unnatural to the listener.
Note that some compressors will not have an adjustable knee setting.
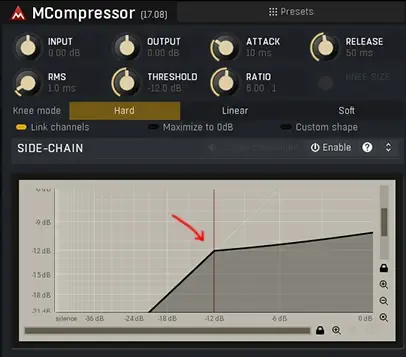
Hard Knee Example
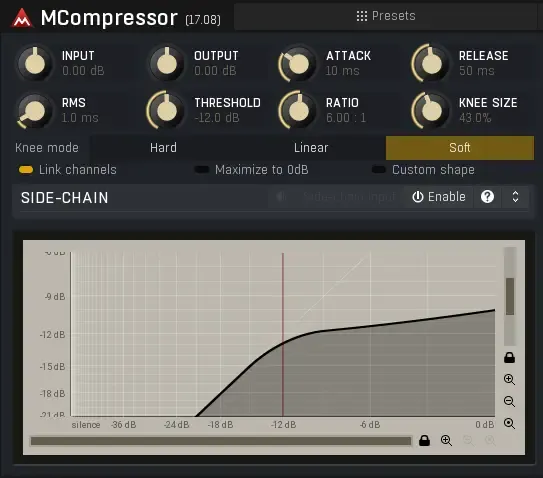
Soft Knee Example
Plugin interfaces shown: MCompressor by MeldaProduction
Makeup Gain (Level Matching)
Every compressor that you use will have some sort of Output or Makeup Gain dial. This is useful because compression reduces the volume of loud peaks, the overall signal level drops. Makeup gain allows you to boost the entire compressed signal back up to match your mix levels.
When you listen to level-matched before & after audio examples, makeup gain was used to adjust the volume of the final signal to match the loudness levels of the audio before it hit the compressor.
Sidechain Routing (Ducking)
Sidechaining allows the compressor's internal detector circuit to respond to a different audio track. That's right - you can actually trigger a compressor on a track like a bass guitar when the kick was hitting.
This is done by feeding the trigger of the compressor on the bass guitar track by the output of the kick drum. Why do this? Because your kick and your bass can fight against the same frequencies, so using a really fast compressor here to duck the bass guitar loudness only when the kick hits can let the kick cut through while the bass still sounds intact.
Sidechaining can be used for a wide range of applications, but one other common one is to sidechain the instrument bus using the lead vocal as the trigger. If the compression settings are dialed in right, it will help turn down the instruments a bit to let the lead vocal shine through.
Fun Fact: Ducking is used by radio stations all the time. Have you ever noticed how the music is quieter so the DJ's voice is always clear like when they are talking over the intro or outro of a song? That is ducking in action, using the DJ's voice as the trigger to compress the song that is playing.
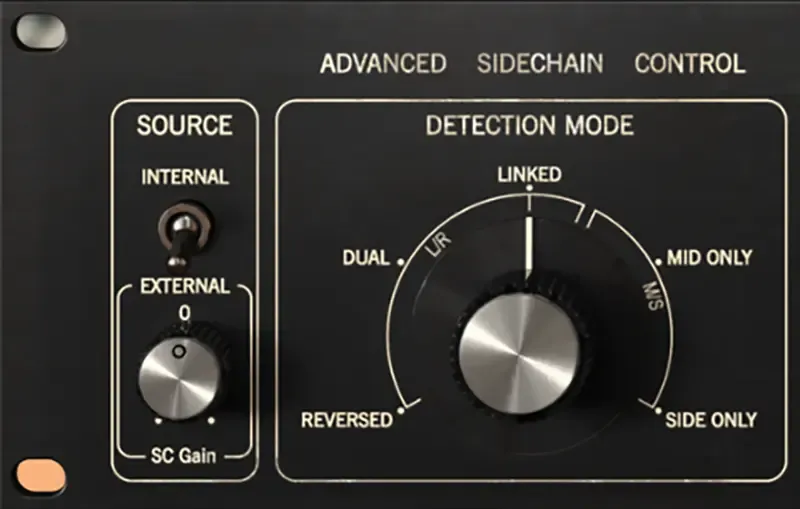
Advanced sidechain control panel in the Arturia Comp FET-76, showing the external trigger switch, SC Gain dial, and detection mode selector.
Demystifying Compressor Types (Why Circuitry Matters Less Than You Think)
If you read forum threads or YouTube comments, you will hear dogmatic "rules" about analog compressor topologies:
"You MUST use an FET compressor on drums because it's fast!"
"You CANNOT use a Vari-Mu tube compressor on fast transients!"
"Opto compressors are only good for smooth vocals!"
Here is the truth: The type of compressor matters far less than Internet tutorials claim.
Many of these sweeping rules are built on misunderstandings of vintage hardware specs. Let's dismantle these myths with facts.
Example Compressor Circuits
For these examples, I am going to discuss analog/analog emulation compressor plugins. Programmatic compressors either imitate or do not have any characteristics where circuitry would matter.
The fact is this: analog electronics modify the sound passing through them. Because of that, certain historical compressors have grabbed the attention of people across time for their behavior.
But instead of going into detail to understand how the sound was being manipulated by these classics, many people cling to assumptions - some that are flawed.
Use the following information as a guideline, not a rule. It is being presented so you have some familiarity with terminology, but always use your own ears and sonic judgment in the end.
The Opto Circuit
Opto (optical circuit) compressors use a light source and a light sensor to engage the compressor. When the threshold is surpassed, the internal light brightens, causing the sensor to engage compression. This kind of circuit is a little bit slower (10 ms attack time in a Teletronix LA-2A, for example).
These compressors tend to have a smooth, non-linear release curve and are heavily program-dependent (responding dynamically to different sound sources).
The LA-2A only has two knobs for controls: Peak Reduction and Gain (makeup gain via the output amplifier), but other optical compressors can have additional control over the compression settings.
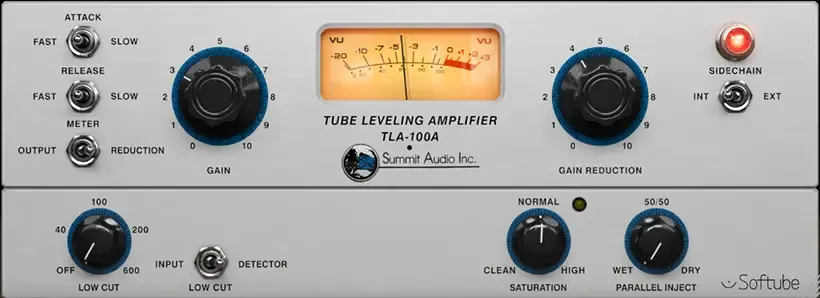
Plugin Interface shown: Softube Summit TLA-100. Uses an optical gain reduction circuit and a tube output amplifier.
The FET Circuit
FET (Field Effect Transistor) compressors that use this circuitry are famous for quite fast attack times. For instance, the classic UREI 1176 compressor has an attack time that ranges between 20 to about 800 microseconds. (A microsecond is 1/1,000 of a millisecond!)
This kind of circuitry can add aggressive analog saturation and grit to the signal, making 1176-style compressors ideal for punchy, saturation-heavy transient control.
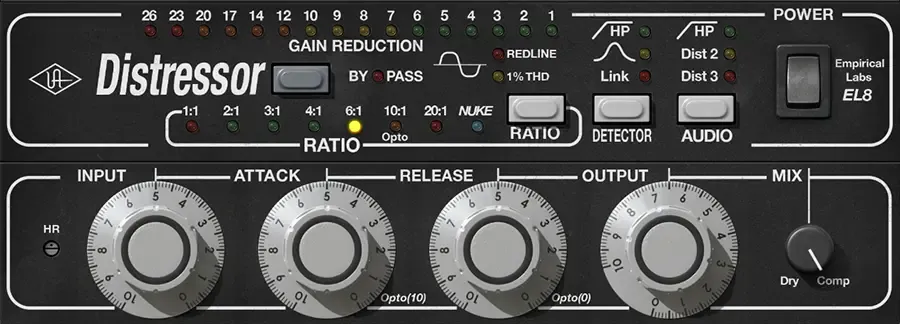
Plugin Interface shown: Universal Audio EL-8 Distressor
The VCA Circuit
VCA (Voltage Controlled Amplifier) compressors use solid state integrated circuits and tend to be quite clean, adding very little to the harmonic content. They are also pretty fast (0.1 - 1 ms) on the attack side of things.
Two famous VCA compressors are the SSL G-Bus compressor and the dbx 160. While the SSL G-Bus is known for its glue and smooth control on the master bus, the dbx 160 can be really snappy.
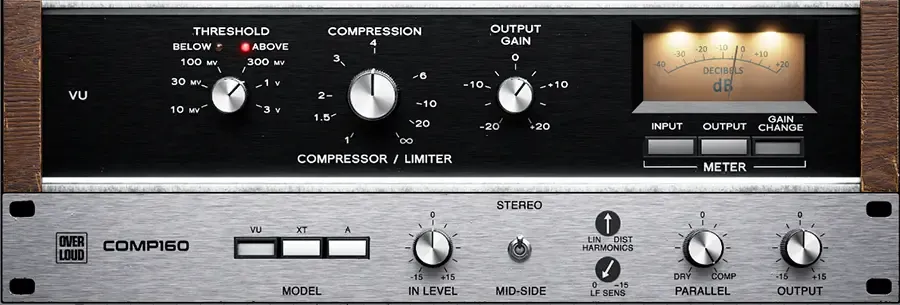
Plugin Interface shown: Overloud Gem Comp160
The Vari-Mu (Tube) Circuit
In the land of electrical engineering, the Greek letter μ (mu) represents gain. Vari-Mu compressors use vacuum tubes in their gain reduction circuit. This can create some pleasant saturation and amazing attack times - the manual of the Fairchild 670 states "The MODEL 670 can produce full limiting effect during the first 10,000ths of a second."
That saturation from the vacuum tubes tends to be even-order harmonics, which can create a distinct thickening in the lower midrange frequencies.
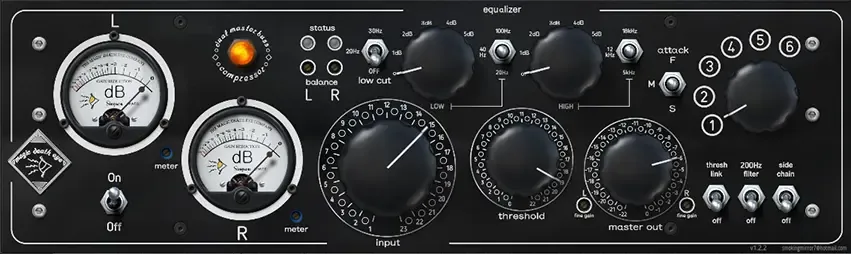
Plugin Interface shown: DDMF Magic Death Eye Stereo Compressor
The Diode Bridge Circuit
Diode Bridge compressors were first introduced in the 1940s by Telefunken, but Rupert Neve popularized the design in classic units like the Neve 2254 and 33609.
For gain control, diode bridge circuits convert alternating current (AC) into direct current (DC), a process known as rectification. Fast attack times sit around 2 ms. These circuits deliver unique, harmonically-rich vintage character.

Plugin Interface shown: Kiive Audio AudioScape MK-609
The Myth of "Fixed" Plugin Rules
Modern digital software has changed the rules. In the analog domain, physical components (lightbulbs, transformers, vacuum tubes) dictated operational speeds and curves. Inside a modern DAW, a modern digital compressor plugin can execute any attack curve, release shape, or ratio you demand - regardless of what vintage graphic interface is slapped on the front panel.
Blindly applying vintage hardware "rules" inside a digital workflow traps you in rigid thinking. What matters is the control curve - not the vintage label on the plugin GUI.
VCA, FET, Optical and Vari-Mu: What Actually Changes?
Understanding how hardware circuits originally functioned helps you anticipate how their plugin counterparts behave. While we covered this above, it is worth it to bust a few myths about this equipment:
FET (Field Effect Transistor)
While these compressors are known for their lightning-fast, ultra-aggressive response times, people claim FETs (1176-style) are mandatory on drums because they "keep up with transients."
Myth Buster: Because an 1176 attack is so lightning fast (20 to 800 microseconds), setting a fast attack on an 1176 actually can shave off the drum transient entirely, turning sharp hits into thick, smashed sustain that kills the groove.
Optical (Opto)
Beginners often claim Opto compressors are "too slow and unpredictable for modern mixing" because they lack attack and release knobs.
Myth Buster: In reality, that lack of manual control is their superpower. Opto release times are program-dependent: they recover rapidly from short transient spikes, but release slowly after sustained loud passages. This natural two-stage release automatically smooths out complex performances like lead vocals without you having to touch a knob.
Pro Tip: Fewer knobs mean fewer choices in your workflow = higher efficiency!
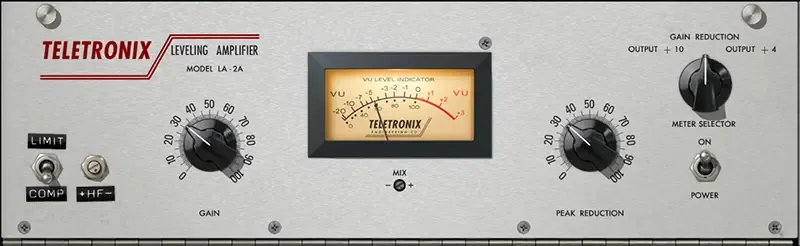
Plugin Interface shown: Universal Audio LA-2A Silver
VCA (Voltage Controlled Amplifier)
Tutorials often claim VCA compressors sound "sterile, clinical, and boring" compared to tube or optical gear.
Myth Buster: In reality, that transparency is precisely why they are used on world-class mix buses. A VCA doesn't sluggishly smear your low end or muddy your highs - it reacts with mathematical precision to lock the rhythm section together, giving you the famous "bus glue" without sacrificing clarity.
Fun Fact: Before the SSL 4000B mixing desks came out, there were only tracking desks, and tracking desks did not have a compressor on the master bus. SSL's famous G-Bus compressor is still used today for master bus glue.
Vari-Mu (Variable-Mu / Vacuum Tube)
Internet mythology claims tube gear is inherently slow, soft, and warm, making Vari-Mu units useless for aggressive, fast-moving material.
Myth Buster: This is complete garbage. The legendary Fairchild 670 - a pure Vari-Mu tube compressor - boasts an attack time as fast as 200 microseconds (0.2 ms). That is faster than almost every VCA compressor on Earth! (Don't believe me? Check out the manual!)
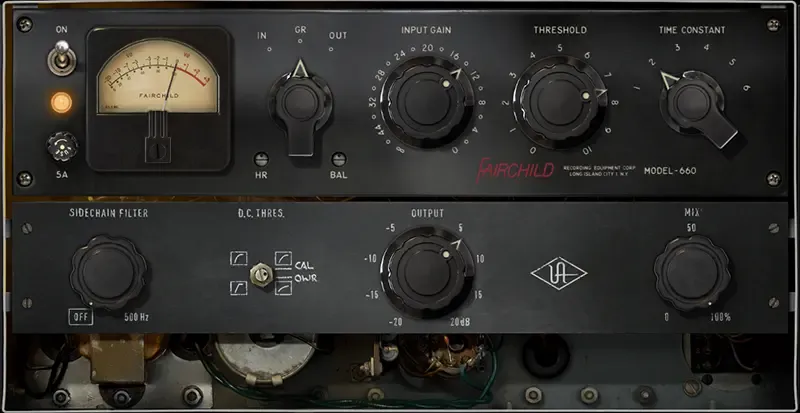
Plugin Interface shown: Universal Audio Fairchild 660
The Real Superpower of Analog Emulations: Saturation and Character
If modern digital compressors are more precise and flexible, why do top producers still reach for analog emulation plugins modeled after vintage units?
It isn't because of the dynamic reduction curve - it is because of harmonic saturation and nonlinear character.
Nonlinear Behavior and Harmonic Distortion
When signal passes through vintage transformers, vacuum tubes, and discrete transistor circuits, it doesn't just get turned down. The physical components gently round off signal peaks and generate subtle even- and odd-order harmonics.
Harmonic distortion adds frequency information that wasn't present in the original recording. This makes tracks sound:
Brighter and clearer (odd harmonics add top-end sizzle).
Fatter and warmer (even harmonics add thick low-mid warmth).
Perceptually louder without increasing the digital peak meter level.
When you use an 1176, LA-2A, Fairchild 670 or other analog emulation plugins, much of the magic you hear isn't coming from the gain reduction needle moving - it comes from the harmonic saturation injected by the modeled circuitry!
Embracing the Glitch: The "All-Buttons-In" 1176 Effect
Hardware components do weird, unpredictable things when pushed beyond their engineered operating limits.
On an original hardware UREI 1176, engineers discovered that if you press all four ratio buttons (4:1, 8:1, 12:1, 20:1) down simultaneously, the internal bias circuit glitches.
Instead of breaking, the compressor shifts into an explosive, highly aggressive mode:
Nonlinear Ratio Shift: The ratio leaps to a violent, nonlinear curve between 12:1 and 20:1.
Distorted Attack Envelope: The attack envelope gets distorted, letting a massive burst of initial transient sneak through before slamming the sustain down.
Erratic Release Pumping: The release circuit pumps erratically, adding aggressive harmonic saturation.
This glitched "all-buttons-in" mode (or "British Mode") became the secret weapon for room mic smashing, aggressive rock drum parallelism, and upfront industrial vocals.
And here's the cool thing - some plugins model this kind of behavior, emulating this exact circuit instability.
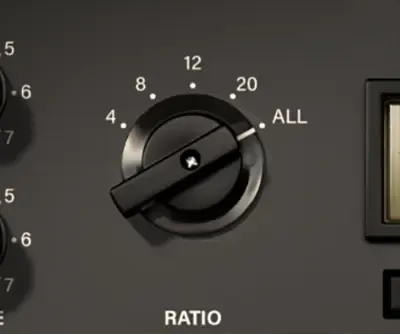
Plugin Interface shown: Overloud GemComp76
How Different Analog Compressor Emulation Plugins Affect Sound
Words are great, but real audio examples are better. Check out how different compressors affect this raw drum clip to get a sense of how much you can sculpt your sounds with proper compression choices. In each of these level-matched audio examples, ~5 dB of gain reduction was the maximum target.
Note: These settings and compressors are being used for demonstrative purposes - always make meaningful compressor selection when working on your program material.
Raw Audio:
Listen to the natural sound of the uncompressed dynamics.
1176 (4:1 ratio):
Listen to the snare drum sound here - the compressor pulls down the initial stick hit, bringing up the buzz so it sounds like the physical snares are looser. It also adds a bright top-end to harmonic sheen that makes the snare sound higher pitched.
1176 (All Buttons In/British Mode):
Listen to how the snare drum transients are clamped down by the compressor, while heavy harmonic saturation and aggressive room decay are pulled up by the extreme compression 'glitch' ratio.
LA-2A:
Listen to how the quieter background details and drum sustain are smoothly pulled forward as the optical circuit clamps down on the main hits.
Fairchild 660 (mono version of the Fairchild 670):
Listen to how the snare gains extra low-end weight, warmth, and body from the tube circuitry and heavy transformer saturation.
dbx 160 (4:1 ratio):
Listen to how the snare gets an immediate, aggressive 'snap' and crack to its transient, characteristic of a fast VCA compressor.
How to Dial in Compression: A Step-by-Step Practical Workflow
Until you get a handle on how to work with compressors more intuitively, stop guessing. Follow this repeatable 5-step system to dial in compression accurately on any instrument, every single time.
Here are the five steps to dial in your compressor:
1) Identify the Need: Groove vs. Leveling
2) Set Extreme Ratio and Threshold to Isolate Movement
3) Dial the Attack to Shape the Front Edge
4) Time the Release
5) Back Off the Ratio and Level Match
Step 1: Identify the Need (Groove vs. Leveling)
Ask yourself: "Am I trying to shape the punch and rhythm of this track, or am I trying to pin a straying volume level in place?"
If Groove: You will need a slower attack to preserve the initial hit and a release timed to the song's tempo.
If Leveling: You will need a faster attack to catch spiky peaks and a smoother, longer release to avoid unnatural volume pumping.
Step 2: Set Extreme Ratio and Threshold to Isolate Movement
It is hard to hear subtle 2 dB gain reduction when you are starting out.
Crank the ratio up to 8:1 or 10:1.
Pull the threshold down hard until the needle is knocking off 6 dB to 10 dB of signal.
Yes, this will sound terrible and squashed. That is the point!
You are making the compression action so obvious that your ears can clearly hear how the attack and release settings alter the sound.
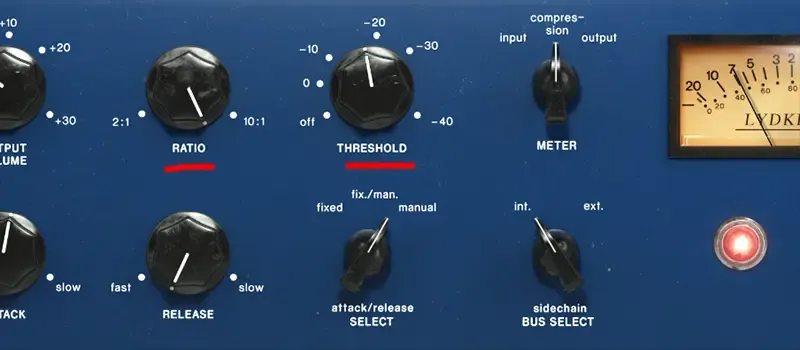
Plugin Interface shown: Softube Tube-Tech CL 1B Mk II
Step 3: Dial the Attack to Shape the Front Edge
Focus entirely on the first fraction of a second of the hit (the transient). For groove control, follow these steps to preserve the punch of the rhythm:
Turn the attack control as fast as possible: The snare drum should lose its crack and move back in the soundstage. If it doesn't, you might need a compressor with a faster attack speed.
Slowly back the attack off slower: Listen for the exact point where the initial "crack" or "snap" punches through uncompressed right before the compressor clamps down on the body. Stop as soon as the hit feels punchy.
For leveling control, do these steps to get those dynamic peaks managed:
Turn the attack control to the slowest setting: At this point, those louder peaks should be sneaking through - for vocals, you will likely hear this in the consonants that are being sung.
Slowly move the attack faster: As you move the attack faster, the spiky transients will stop jumping out at you as they get leveled by the compressor. If the vocal starts sounding dull or loses its life, back the attack off to a slightly slower speed.
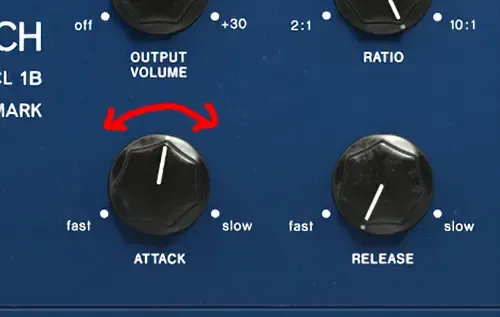
Plugin Interface shown: Softube Tube-Tech CL 1B Mk II
Step 4: Time the Release
Focus on the tail of the sound and watch the gain reduction meter. For Groove Control, follow these steps to set the release just right:
Turn the release fast: Hear how the room noise and sustain rush back in aggressively (pumping)? Setting the release this fast is intentionally extreme so you can hear the tail - your goal now is to slow it down until the gain reduction needle recovers to 0 dB right before the next beat hits.
Slow the release down: Watch the gain reduction needle. Adjust the release knob so the needle moves smoothly in rhythm with the tempo, returning back to 0 dB of gain reduction right before the next major beat or drum strike. This will actually create a subtle, musical 'bounce' in time with the tempo.
Caution: If the gain reduction needle is still recovering when the next beat hits, that beat will get compressed instead of coming through clean - that will cause you to lose that rhythmic swell and body of the sound.
For Leveling Control, the goal is to match the phrase instead of the beat:
Turn the release fast: With our high ratio setting, a fast release causes unnatural 'gasping' or volume fluttering between words or notes. This sounds harsh, but it gives you a clear baseline to adjust from.
Slow the release down: Unlike with groove control, the gain reduction needle does not need to return to 0 dB between every note. Slow the release until the needle floats steadily around 2 dB to 4 dB of reduction throughout the phrase, smoothly letting go only when the performer pauses or takes a breath.
Caution: If you hear your vocal 'gasping' or some ambient mic spill jumping up awkwardly between notes, your release is too fast. On the flipside, if your compressor is still clamping down after the end of a chorus when the next verse hits, your release is too slow.
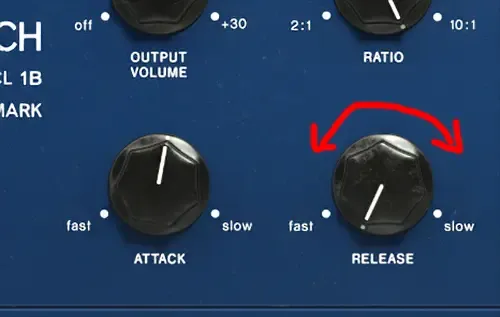
Plugin Interface shown: Softube Tube-Tech CL 1B Mk II
Step 5: Back Off the Ratio and Level Match
Now that the attack and release are moving in perfect harmony with the song's tempo, ease back on the extreme settings:
Adjust the Ratio: Back the ratio off to a more realistic setting that musically fits the song. You might end up in the 2:1 range for light control or 4:1 for moderate punch.
Adjust the Threshold: Raise the threshold until gain reduction sits at a reasonable level - typically 1 dB to 4 dB for Leveling Control or 3 dB to 7 dB for Groove Control. The gain reduction will depend on how dynamic the sound is coming into the compressor and how much work the tool needs to do.
Level Match: Toggle the plugin's makeup gain so that the output volume matches the bypassed volume exactly. You can use your ears here or a loudness meter (LUFS-I: Loudness Units Full Scale - Integrated).
If you don't level match, your brain will trick you into thinking the compressed track sounds "better" simply because it is louder. Level matching forces you to judge whether the dynamic shape, groove, and tone actually improved the mix.
Also, you don't want your compressor to mess with the volume balance in your mix. As your ears get better, you will be able to adjust this pretty close to the right level without using meters, but give yourself patience to learn this skill and train your ears.
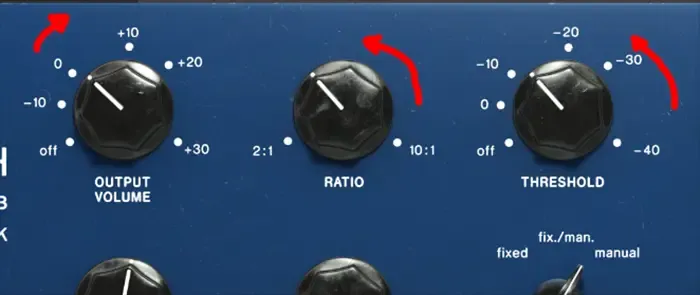
Plugin Interface shown: Softube Tube-Tech CL 1B Mk II
Clippers & Transient Shapers
While traditional compressors rely on thresholds and attack curves to manage dynamic range over time, two specialized processors solve dynamic problems with pinpoint surgical precision: clippers and transient shapers.
These tools bypass the traditional compression workflow altogether, giving you direct control over the physical shape of an audio waveform. When added to your dynamic processing toolkit, they handle extreme peak control and envelope reshaping without introducing the sluggish pumping or dulling artifacts often caused by heavy compression.
Why Use a Clipper?
A clipper is a dynamic control tool that acts like an absolute ceiling for audio waveforms. Unlike a compressor that turns down the volume over a set attack time, a clipper instantly truncates any audio signal that exceeds its ceiling threshold.
Hard clippers shear off peak tops completely, while soft clippers round off the transition smoothly, adding warm harmonic saturation. All clippers will add some kind of saturation or distortion, but the level of hardness or softness will affect how that character comes through in the sound that is being treated.
The primary reason to use a clipper is to shave off invisible, hyper-fast transient spikes before they ever hit your compressors or master limiters. Drum hits, plucked acoustic instruments, and slap bass lines often contain massive micro-transients that last for only a fraction of a millisecond. If these peaks reach a standard compressor, they force the detector circuit to clamp down heavily, squashing the rest of the sound. By running a clipper first, you flatten those useless spikes transparently.
Because clipping removes transients without altering the overall sustain of the track, it allows you to increase perceived loudness without sacrificing punch or eating up digital headroom. It gives you a denser, louder, and more stable signal that passes through the rest of your signal chain effortlessly.
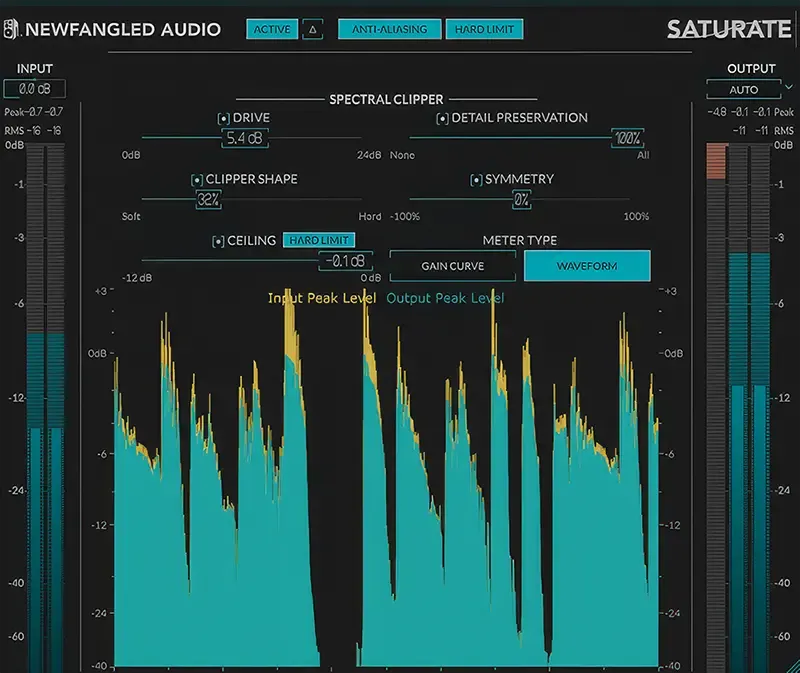
Plugin Interface shown: Newfangled Saturate
Listen to level-matched examples of the difference between a compressor and a clipper in action:
Raw Audio:
Listen to the unprocessed audio sample.
Compression Applied:
Listen to how the compressor controls the loudest transients and pulls up subtle sustain and tone between notes.
Clipper Used Instead:
Listen to how the clipper shaves off the peak transients to rigidly control dynamic range without altering the envelope of the sound.
Why Use Transient Shaping?
Transient shapers (or transient designers) operate on an entirely different mechanism than compressors: they are completely independent of signal level and threshold. Instead of reacting to decibel volume, a transient shaper analyzes the rate of change in an incoming signal, allowing you to independently boost or cut the attack (initial impact edge) and sustain (tail or room tone).
You use a transient shaper when you want to change the physical impact of a sound without altering its overall dynamic level or dealing with complex attack and release curves. If a snare drum lacks bite in a dense rock mix, boosting the attack dial instantly adds crack without changing how the rest of the drum rings out. Conversely, if a kick drum has too much click or an acoustic guitar pick sounds too harsh, cutting the attack dial softens the front edge cleanly.
The secondary power of a transient shaper lies in its sustain control. You can turn down the sustain knob to dry up room mic bleed, or boost the sustain knob to pull out natural resonance and tail weight of a bass note or drum decay. It provides a level of envelope control that would require tedious manual volume automation or complex multi-stage compression to achieve otherwise.
Listen to how a transient shaper can affect a snare drum hit:
Raw Audio:
Listen to the unprocessed audio sample.
Attack Boosted (Transient Shaper):
Listen to how the initial punch of the snare hit is enhanced while the tail stays consistent.
Sustain Boosted (Transient Shaper):
Listen to how the ring and decay of the snare drum are brought out while the drum transient stays consistent.
Your Next Steps
Dynamic processing isn't a secret society, and it isn't a collection of rigid vintage rules passed down by internet gatekeepers. It is simply a set of creative cheat codes designed to make your music bounce, breathe, and lock into place.
Note carefully that all of these dynamic processing tools that we have covered are simply that: tools. Depending on what your objective is, you might reach for one tool over another. Avoid falling into the trap of focusing on one tool and only using that to try and solve all of your dynamics processing challenges.
Forget about memorizing magic plugin settings. Focus on training your ears to identify impact versus sustain. Decide whether a track needs rhythmic groove control or rock-solid leveling. Time your release curves to the BPM of the song, leverage harmonic saturation for character, and let your ears make the call.
Now open your DAW, grab a compressor, smash the controls to hear what they do, and start shaping the energy of your tracks today!
Found this guide helpful?
Spread the word and share with another creator.
Return to Plugins & Processing Topic Hub
About the Author

Jim is the creator of Embervane — a lifelong music maker with a curiosity‑driven approach to creativity and learning. He has been playing drums since age nine and composing seriously since 2018, continually refining his craft through study, experimentation, and hands‑on practice.
With a background in chemistry and more than two decades of studying behavioral psychology, Jim brings a unique blend of scientific thinking and human understanding to music education. He beta‑tests tools for companies like Mastering the Mix, Kit Plugins, and Soundiron, which keeps him close to the evolving landscape of modern production.
Jim isn’t a celebrity producer or award‑winning engineer - he’s a creator who remembers exactly what it feels like to struggle, learn, and grow. His mission is to help other music makers build clarity, confidence, and momentum in their craft.
Jim is the creator of Embervane — a lifelong music maker with a curiosity‑driven approach to creativity and learning. He has been playing drums since age nine and composing seriously since 2018, continually refining his craft through study, experimentation, and hands‑on practice.
With a background in chemistry and more than two decades of studying behavioral psychology, Jim brings a unique blend of scientific thinking and human understanding to music education. He beta‑tests tools for companies like Mastering the Mix, Kit Plugins, and Soundiron, which keeps him close to the evolving landscape of modern production.
Jim isn’t a celebrity producer or award‑winning engineer - he’s a creator who remembers exactly what it feels like to struggle, learn, and grow. His mission is to help other music makers build clarity, confidence, and momentum in their craft.

The spark that leads to your next breakthrough.

©2026 Embervane LLC. All rights reserved. Embervane™ is a trademark of Embervane LLC.