
Step-by-Step Guide to Using DAW Templates to Speed Up Your Music Production
Hidden Friction is Killing Your Creative Momentum
Picture this familiar scenario: You get a sudden burst of inspiration for a killer synth line, a punchy drum groove, or a vocal melody. You jump out of your chair, open your Digital Audio Workstation (DAW), and hit "New Project."
Instead of playing music, you spend the next fifteen minutes performing administrative chores.
You create eight empty audio tracks. You create five virtual instrument tracks. You rename "Audio 1" to "Lead Vocal." You create aux busses for your favorite reverb and delay. You search through your drive for your go-to drum samples, assign outputs, color-code your tracks, and set up your sidechain routing.
By the time your session is organized and ready for audio input, that initial spark of creative energy has faded. You find yourself auditioning sound presets idly, second-guessing your initial idea, or staring at a blank timeline before closing the project entirely. Is this the way to build a productive music workflow?
This invisible drag is the single biggest reason music producers struggle to finish tracks. Every time you pause your creative process to execute technical configuration, your brain leaks a small amount of focus.
Learning how to use templates to speed up your music production isn't about forcing your creative ideas into a rigid mathematical box. It’s about eliminating mechanical setup friction so you can write, record, and produce music instantly while your inspiration is at its peak.
This guide is designed to help you maximize templates in your workflow. Eliminate that invisible friction and step up your music making productivity.
Let's get efficient!
Why DAW Templates Matter: Protecting the Flow State
A DAW template is a pre-configured starting project saved on your computer that loads instantly whenever you launch a new session. Rather than starting from a completely blank canvas, a template provides an organized workspace where your infrastructure, routing, and preferred tools are already wired and ready to go.
Create Mode vs. Computer Operator (Edit) Mode
Your brain operates in two distinct modes when making music: Create Mode and Computer Operator (Edit) Mode. Here is the fundamental problem - your brain can only exist in either create or edit mode at one point in time.
Create Mode
Create Mode is right-brained, intuitive, emotional, and fast. It relies on immediate tactile feedback, performance expression, and raw experimentation. This is the feeling side of things that lets you tap into the flow of things.
Computer Operator (Edit) Mode
Edit Mode is left-brained, analytical, logical, and methodical (slow). It involves file management, signal routing, gain staging, and utility plugin assignment. It is where learning and things like math happen.
When you start a session from scratch, you force your brain into Edit Mode right at the precise moment it needs to be in Create Mode. Constantly flipping back and forth between these two brain states taxes your mental currency because you actually lose steam each time you flip. Do it enough times and you will kill that creative flow to a dead stop, and that is when an idea dies.
Using session templates preserves your cognitive energy for high-value artistic decisions - like writing melodies, arranging sections, and tweaking sound design - rather than wasting it on track assignment.
The "Surgeon’s Tray" Philosophy of Music Production
Think about how a surgeon operates in an emergency room. When a surgeon steps up to the operating table, they don't spend twenty minutes opening drawers, looking for scalpels, sterilizing individual tools, or setting up tray stands. An assistant has already laid out every essential instrument within arm's reach before the procedure even begins.
That is true operational efficiency.
But most of us do not have an assistant that can set everything up for us. So, a well-built DAW session template functions as your personal surgical tray and assistant.
It doesn't restrict what you do next or tell you how you write your song. Instead, it places your go-to sound engines, routing paths, and utility tools directly at your fingertips before you make a single musical move. It removes the thinking from the equation and lets you focus on feeling the music.

Essential Elements: What to Include in Your Master Template
Building an effective template requires finding the balance between having enough infrastructure pre-configured to save time without cluttering your session with unnecessary heavy plugins that drag down your system CPU. That surgeon's tray did not have every possible tool on it - just the ones most likely for the task at hand.
Here are the five core components every producer should include in their main starting template:
1. Pre-Routed Submixes and Group Busses
Setting up audio routing on the fly during a session breaks your momentum. In your master template, create dedicated submix busses (also called group tracks or stem busses) and route all individual tracks to them by default.
A standard bus routing layout includes:
Drums Bus: Pre-routed to receive all kick, snare, hi-hat, and percussion tracks.
Bass Bus: Pre-routed for main basslines, sub-bass, and mid-range bass layers.
Music / Synths Bus: Grouping all keyboards, guitars, pad layers, and lead synths.
Vocals Bus: Consolidating lead vocals, double tracks, and background harmonies.
FX Bus: Housing reverbs, delays, and other elements like risers, downlifters, sweeps, and atmospheric sound effects.
Routing tracks to group busses from second one allows you to do quick balance checks, apply glue compression across instrument families, and print clean stems when your song is ready for mastering.
2. Pre-Loaded Virtual Instruments and Drum Racks
If you catch yourself reaching for the same acoustic piano patch, sub-bass synth, or drum kit in every project, pre-load them directly into your template.
Leave these instrument tracks unmuted and ready to play immediately via your MIDI controller. If you write electronic or beat-focused music, build a go-to drum rack loaded with your favorite punchy kicks, crisp snares, and closed hats.
If an idea calls for a totally different sound later in the session, you can easily swap the plugin out - but having a playable sound ready the instant your DAW opens removes the barrier between idea and execution.
(Pro Tip: Different song genres may require different instrument sets - keep that in mind because you are not limited to one template here.)
3. Auxiliary FX Returns (Reverbs, Delays, and Parallel Chains)
Creating individual reverb or delay plugins on every single track wastes huge amounts of computer processing power and leads to a cluttered mix.
In your starting template, create three or four dedicated Auxiliary (Aux) send tracks loaded with your go-to spatial processors:
Short Room Reverb
Set to 100% wet for creating subtle physical space around drums and rhythm elements.
Long Hall or Plate Reverb
Set to 100% wet for lush vocal tails, ambient pads, and synth leads.
1/8 Note & 1/4 Note Delays
Pre-configured with subtle high-pass and low-pass filters to keep delay tails clean.
Parallel Compression
Pre-routed with an aggressive compressor for blending weight into drums or vocals.
When every channel in your session already features send knobs linked to these aux tracks, adding depth and dimension to a sound takes two seconds instead of two minutes. And, you have the flexibility to add, remove, ignore, or tweak these pre-sets later if the song needs it after you take care of the creative side of things.
4. Visual Organization: Color Coding and Naming Conventions
Navigating a session with sixty un-colored tracks labeled "Audio_01," "Audio_02," and "Inst_05" forces your brain to stop and read text every time you want to make an edit. Reading text takes extra brainpower - at least when you should be focusing on making music.
One mix engineer that I know actually just draws symbols on his mixing board to represent different instrument tracks - he knows what they mean and symbols are easier to read than words. Sadly, our DAWs don't typically let us do this, but some do have visual representations of instruments that you can use for the same effect - lean into this if available.
Establish a strict visual organization system and lock it into your template:
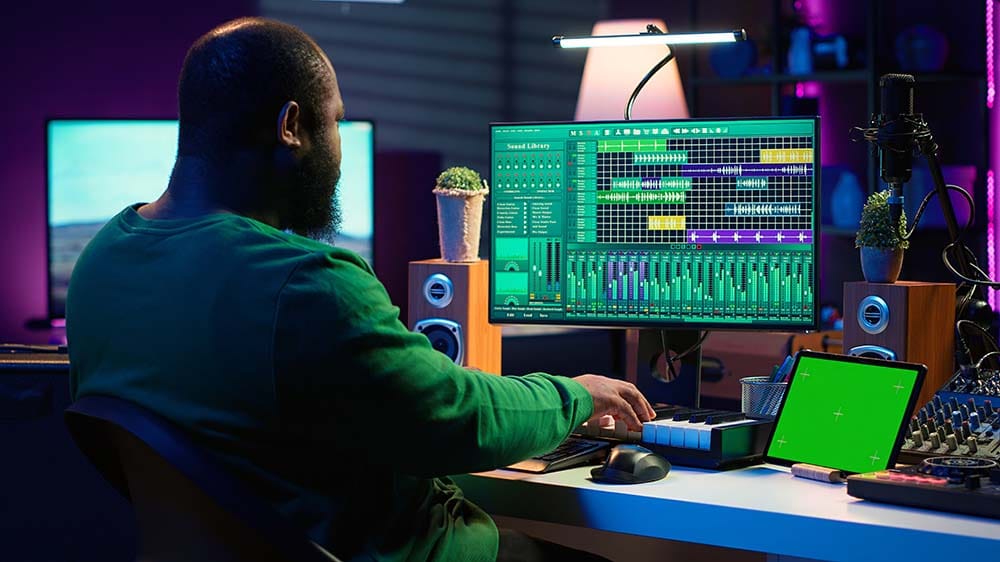
Assign consistent colors to instrument groups (e.g., Red for Drums, Yellow for Bass, Blue for Synths, Green for Vocals). The colors don't matter, as long as you are consistent so your brain doesn't have to think about this.
Name empty tracks with clear structural placeholders (e.g., [KICK], [SNARE], [BASS], [LEAD VOCAL]).
Insert visual markers or section locators along the top timeline (Intro, Verse, Chorus, Bridge, Outro) to give yourself a clear roadmap for arranging.
When your eyes instantly recognize track types by color and position, your navigation speed doubles.
When I am mixing a song, for instance, I use my mixing template to simply dragging and dropping the appropriate tracks into their respective colored groups and then boom - I am getting to work. If I am composing a song, I can get right to creating with my production template without having to think about loading instruments.
5. Default Gain Staging and Master Bus Monitoring
Opening a fresh project only to have your master channel clipping red on the very first synthesizer note is frustrating and bad for mix headroom.
In your default template, pull down all channel faders to a sensible baseline (around -6dB to -8dB) so your initial sounds enter the DAW with plenty of clean headroom. On your master bus, insert your preferred utility plugins - such as a clean LUFS loudness meter, a frequency spectrum analyzer, or a high-pass utility filter - leaving them turned off or set to neutral until you are ready to evaluate your overall mix balance.
Tailoring Your Setup: Building Genre-Specific Templates
While having one general "Master Starting Template" works well for everyday writing, producers who work across multiple musical styles benefit massively from creating specialized, genre-specific production templates.
Different musical genres carry wildly different production demands, track counts, and routing configurations:
Electronic & Hip-Hop Templates (Focus on Drums and Low-End)
For genres like Trap, Hip-Hop, House, or Techno, the interaction between the kick drum and the bassline is the absolute core of the track.
Pre-Set Sidechain Routing: Pre-wire a sidechain compressor or volume utility from your kick drum directly to your bass and synth busses. Every time you drop in a kick and a bassline, they duck automatically without requiring manual setup.
Tuned 808 & Sub Tracks: Include a sampler instrument pre-loaded with clean sub-bass patches tuned across the keyboard.
Half-Time & Pitch FX Sends: Pre-configure auxiliary sends with time-stretching or half-time plugins for quick drum-break manipulation.
Pop & Modern Vocal Production Templates (Focus on Layering and Vocal Chains)
Modern pop music relies heavily on intricate vocal production, layered harmonies, and polished lead vocal processing.
Vocal Chain Placeholders: Pre-build track stacks containing dedicated channels for [LEAD VOCAL], [VOCAL DOUBLES], [LEFT/RIGHT BGVS], and [AD-LIBS].
Lead Vocal Signal Chain: Pre-load native or third-party utility plugins across the main vocal bus - a high-pass filter, a gentle levelling compressor, a de-esser, and a pitch correction utility set to neutral.
Harmonic Layering Racks: Group keys and synth pads into pre-mapped instrument racks so you can play stacked chord voices with a single key press on your MIDI controller.
Cinematic & Ambient Templates (Focus on Orchestral Layouts and Modulation)
Cinematic scoring and ambient music require large track counts, massive soundscapes, and expressive tactile modulation.
Sectional Orchestral Groups: Pre-configure track folders for Strings, Brass, Woodwinds, Cinematic Percussion, and Hybrid Synth Textures.
Pre-Mapped CC Controllers: Map physical faders on your MIDI controller directly to Expression (CC11), Modulation (CC1), and Dynamics (CC1) across all orchestral virtual instruments.
Lush Convolution Reverbs: Pre-route high-quality convolution reverb sends simulating large scoring stages or cathedral halls.
How to Evolve Your Template Over Time Without Getting Trapped
One common fear among beginner producers is that using a template will make all their songs sound identical. This is so far from reality, man.
This only happens if you treat your template as a rigid creative cage rather than an evolving launcher. A template is not a pre-made song; it is an organized workspace. You are free to delete tracks, swap instruments, mute sends, and alter your signal paths whenever a song demands it.
I mean, my kitchen is setup the same way each time I walk into it, but the dishes I cook turn out tasting and looking different from each other, right? Well, the same goes for your music. If everything sounds the same, the template wasn't the problem - trust me.
To keep your workflow lean and avoid creative boredom, follow these three rules of template maintenance:
Perform a Monthly Audit
If you notice that you consistently delete a specific virtual instrument or bypass a particular reverb plugin every single time you open your template, remove it or swap it with whatever else you tend to use instead.
Unused tracks only create visual clutter and consume computer memory - keep the template efficient and this kind of change will make sure it stays relevant to your workflow.
Add Friction Solutions
Every time you run into an annoying technical bottleneck during a production session, make a mental (or physical) note. After the session is finished, update your master template file to fix that specific bottleneck so you never have to solve it manually again.
In my life, I have a 'two-time' warning. A little red flag goes up in my head if I run into a friction situation two times in short order. If the flag goes up, I fix it right then. The little bit of time taken will save lots of headaches later on.
Keep Your Core CPU Lean
Avoid loading dozens of heavy, resource-intensive third-party plugins directly into your starting template. If your template takes 45 seconds to load and throws CPU warnings on startup, it defeats the entire purpose of a fast workflow. Keep your default setup light, fast, and agile.

Frequently Asked Questions
Will using a DAW template make my music sound generic or repetitive?
No. Not at all. A template provides organizational infrastructure - such as color coding, track grouping, and bus routing - not finished musical arrangements. You still control the melodies, chords, sound choices, and mix decisions, for better or worse. Think of a template as a clean, pre-organized workshop, not a step-by-step construction kit.
Where should I save my template file so my DAW opens it automatically?
Every DAW has a dedicated process for saving default templates. Always check with your DAW's manual for how to best use templates.
In Ableton Live, you can save your current session as the Default Set in the File/Folder preferences. In Logic Pro, save your project as a Template under File > Save as Template. In FL Studio, save your .flp file inside the Data > Templates folder inside your user directory.
Should I load third-party plugins directly into my default template?
It is best to keep third-party plugins in your default template limited to essential utility tools - such as lightweight EQs, gain utilities, or simple meters. Avoid pre-loading complex, CPU-heavy virtual instruments or intensive linear-phase processors, as they increase session load times and strain your computer processor before you even start writing.
If you have a couple that are part of your workflow that don't hog up the CPU utilization, then go ahead and put them in there. Just make sure you aren't backing up a dump truck of plugins and gumming up your template.
How many different templates should I create?
Start with just one master writing template. Once you have refined your general setup, create two or three specialized variations based on your primary workflows - such as a dedicated "Vocal Tracking Template," a "Beatmaking Template," or a "Final Mixing Template."
Then, you may expand to use-case templates like a Mixing Template, for instance. Get used to the process before going gonzo here.
Where to Go Next
Mastering how to use templates to speed up your music production is one of the most effective habits you can build to eliminate technical friction and protect your creative flow state. Set up your workshop in good order and feel the power of being able to simply get to work.
Now that you know how to structure your routing, organize your tracks, and build genre-specific templates, here are your next steps to keep your momentum going:
Organizing & Protecting Your Files: Being able to find and protect your creative work is one of the important behind-the-scenes abilities for any music producer. Anyone who has ever lost a music file can attest to this.
Don't let technical configuration block your artistic momentum. Spend thirty minutes today setting up a clean, pre-routed DAW template, and watch how much faster your ideas translate into finished tracks.
If you're looking for a structured, step-by-step roadmap to guide your projects from blank timeline to final master, grab the free Embervane Sparkflow Map. This 35-page framework helps you navigate every phase of the production process so you can beat creative fatigue and cross the finish line.
If you want to push into creating that next song, jump into our free MIDI Madness Tier 1 course.
Keep your setup lean, protect your creative focus, and put your energy where it belongs: on finishing great music!
Found this guide helpful?
Spread the word and share with another creator.
Return to How to Build a Productive Music Workflow Topic Hub
About the Author

Jim is the creator of Embervane - a lifelong music maker with a curiosity‑driven approach to creativity and learning. He has been playing drums since age nine and composing seriously since 2018, continually refining his craft through study, experimentation, and hands‑on practice.
With a background in chemistry and more than two decades of studying behavioral psychology, Jim brings a unique blend of scientific thinking and human understanding to music education. He beta‑tests tools for companies like Mastering the Mix, Kit Plugins, and Soundiron, which keeps him close to the evolving landscape of modern production.
Jim isn’t a celebrity producer or award‑winning engineer - he’s a creator who remembers exactly what it feels like to struggle, learn, and grow. His mission is to help other music makers build clarity, confidence, and momentum in their craft.
Jim is the creator of Embervane - a lifelong music maker with a curiosity‑driven approach to creativity and learning. He has been playing drums since age nine and composing seriously since 2018, continually refining his craft through study, experimentation, and hands‑on practice.
With a background in chemistry and more than two decades of studying behavioral psychology, Jim brings a unique blend of scientific thinking and human understanding to music education. He beta‑tests tools for companies like Mastering the Mix, Kit Plugins, and Soundiron, which keeps him close to the evolving landscape of modern production.
Jim isn’t a celebrity producer or award‑winning engineer - he’s a creator who remembers exactly what it feels like to struggle, learn, and grow. His mission is to help other music makers build clarity, confidence, and momentum in their craft.


©2026 Embervane LLC. All rights reserved. Embervane™ is a trademark of Embervane LLC.