
How to Organize Your Projects, Files, and Samples (So You Don't Lose Anything)
The Secret Time Killer
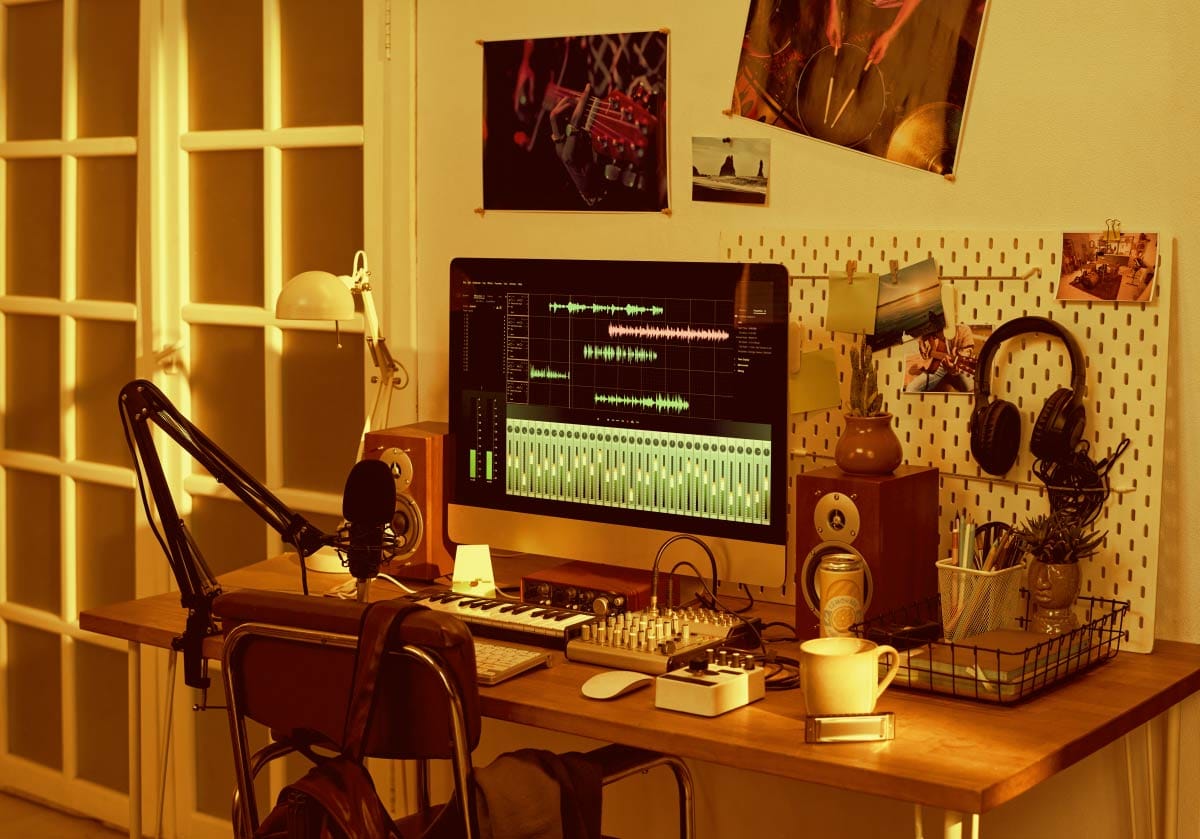
You might not think that file management is part of building a successful workflow, but not being able to find a sample or instrument quickly is a leading cause of friction when making songs. And don't forget about losing a song to a crashed hard drive - nothing is worse.
Building a clean, reliable system for your projects, presets, and sample libraries isn't about being overly strict; it's about protecting your creative flow state. When inspiration strikes, you shouldn't be wasting fifteen minutes searching through a bloated Downloads folder trying to locate a snare sample you used last Tuesday.
When your music computer is disorganized, you pay for it in two ways: lost time and lost work.
First is the creative friction. Your brain cannot simultaneously create and edit at the exact same time. Every time your DAW throws a red alert saying "Missing Audio Files," or every time you open a project only to hear silent tracks where your drum samples used to be, your brain gets pulled violently out of create mode. That momentum cost is massive, and it frequently kills promising song ideas before they ever get arranged.
Second is the catastrophic loss. Hard drives fail. Operating system updates corrupt file paths. Laptops get spilled on or stolen. Without a structured directory and an automated backup plan, years of musical growth can vanish overnight.
In this guide, we are going to cover the necessary evil of setting up an organized system - it can take less than an hour, and once it’s built, it runs on autopilot for the rest of your producing career.
Let's dig in!
Building Your Master Music Folder Architecture
The biggest mistake beginners make is scattering music files across their Desktop, Downloads folder, Cloud Sync drives, and internal documents. To fix this, you need one single master directory that holds every single piece of your musical life.
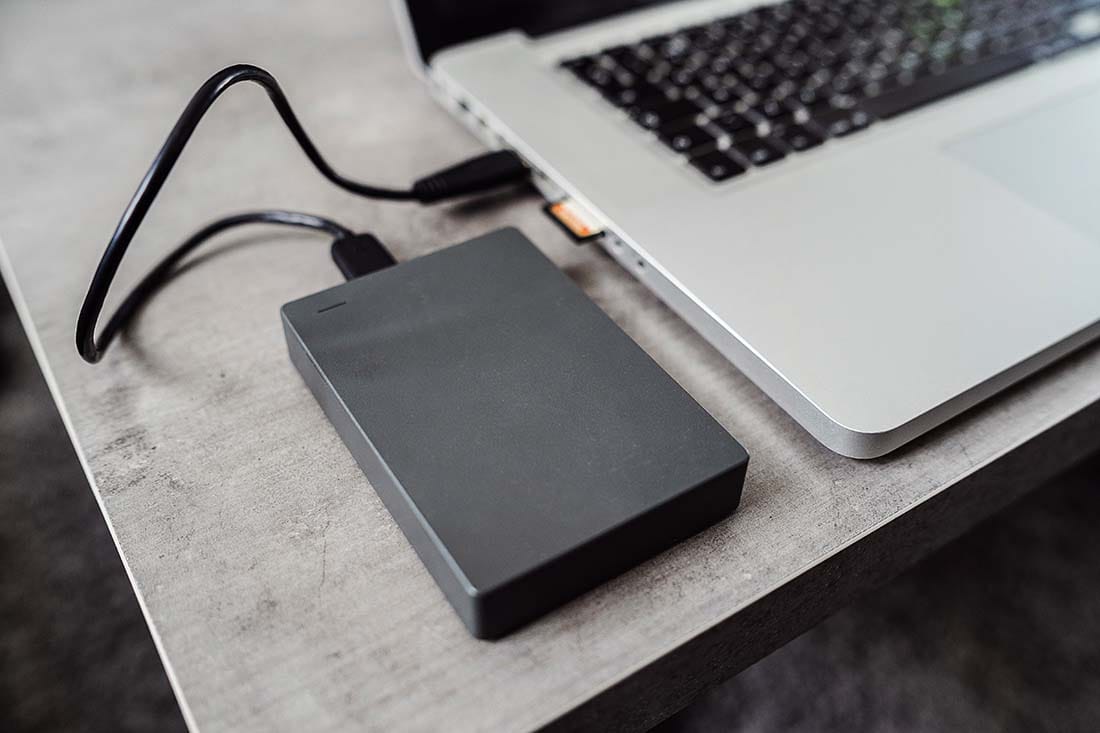
Whether you place this master folder on a dedicated fast internal drive or an external high-speed SSD (a Solid-State Drive), keep everything contained inside a root directory that you name as your producer name or business name.
Now, it is important to note that you are not looking to just dump all of your files into this one main folder like some kind of digital landfill - not at all. If you use a sub-folder structure, you can create a kind of filing cabinet so you can find whatever you are looking for rather efficiently.
Step-by-Step: The Ultimate Producer Directory Structure
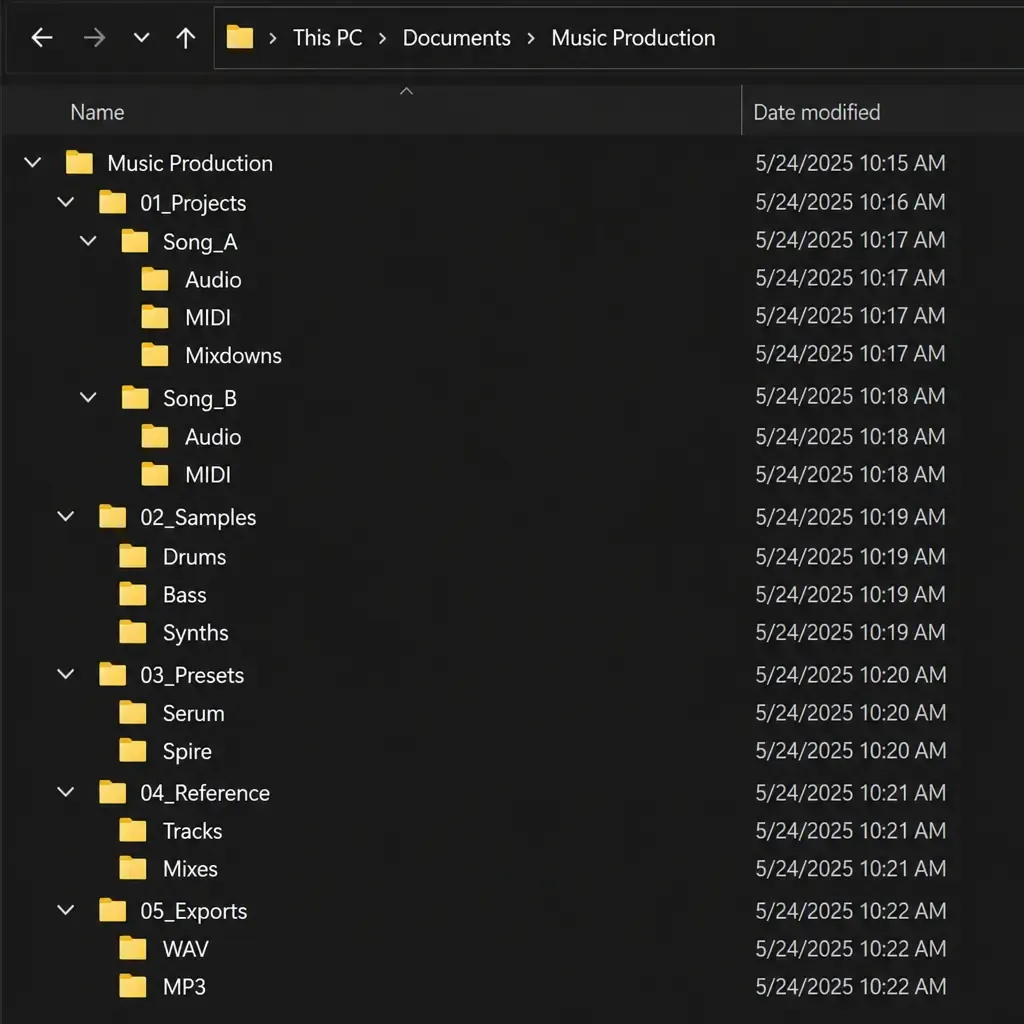
I am going to walk through an example file directory structure to be organized here. You can use your own if you want, as this is not gospel. The core idea is to create a high-level folder structure that allows you to quickly group things related to your music work.
Here are the sub-folders to make inside your main music folder:
01-Projects/ - This is the home for all your active DAW project folders (Ableton, Logic, FL Studio, Studio One, etc.).
02-Sample Library/ - Every drum kit, loop pack, field recording, and vocal pop you own lives exclusively here.
03-Exports & Masters/ - Finished bounce files, work-in-progress MP3s, and final WAV masters intended for release or feedback.
04-Presets & Templates/ - Custom synthesizer patches (Serum, Vital, Kontakt), plugin presets, and DAW session templates.
05-Idea Vault/ - A place for those idea sparks that can be taken into a full song later when the time is right.
Let's go through each folder in a little more detail:
1 - The Projects Folder
At the top of folder list goes a 1-Projects folder - this is your home for all of the active DAW project folders.
You may consider adding sub-folder groups under the 1-Projects area if you work on different types of projects or have different production segmentation. Examples might be Personal Projects, Collabs, Production Clients, depending on how you work.
The idea here is not to have a big pile of projects that you have to sift through, but rather organized silos of projects to better group over time. If you make music across multiple genres, you may want to have a folder division there as well.
2 - The Samples Library
The next main folder is the 2-Samples folder - every drum kit, loop pack, field recording, and vocal pop you own lives exclusively here. Why keep the samples all together? Because they are hard enough to find, but if they get scattered across your digital house then they tend to hide when you need them.
Under the 2-Samples folder, subfolders by type of sample can work - drums, vocals, SFX, etc. Even if you do not own any sample organization product, this kind of organization will help save tons of time when looking for sounds.
3 - The Exports & Masters Folder
Some DAWs will default to storing exported bounced files inside of the project folder, and you can do that if it works for you. Fender Studio, for instance, does this by default. But having a dedicated high-level folder for the final versions of your song means much less digging through project files and nested subfolders when you want to find something.
Make a 3-Exports & Masters main folder - it will contain your finished bounce files, work-in-progress MP3s, and final WAV masters intended for release or feedback.
If you are working for clients, it can be efficient to organize subfolders here with client names and then song names with dates. If you are making your own productions, using a date-song format (like 2026-07-12 River March) can help give you easier access to your finished work, especially after time has passed.
4 - The Presets & Templates Folder
The next main folder is the 4-Presets & Templates folder. Here is where you can store your custom synthesizer patches (Serum, Vital, Kontakt, etc.), custom plugin presets, and DAW session templates.
If you have never experienced the absolute joy of wasting an hour looking for some preset batch you saved for a plugin after something needed to be reinstalled or got moved, then know that this is an experience worth passing on.
Setting up your own DAW, plugin and instrument presets is the fast track to a productive workflow, but you need to be able to access them quickly and smoothly. This folder helps you do that.
5 - The Idea Vault Folder
The final main folder is the 5-Idea Vault folder. This is the place to store those ideas and nuggets that come up so you can cultivate them later without losing them.
Have you ever come up with an idea that might work for a future song while you were in the middle of making a current song? Yeah - that happens a lot. It's part of how our creative brains work... some idea seeds another idea, and it starts a cascade.
This can take us away from finishing a song through distraction if we aren't careful, so capture those little ideas and drop them into the Idea Vault folder. Use whatever subfolders give you organization inside (bass line, chord progression, melody - whatever).
Then, when the time is right, you can take those ideas from a spark to a finished song.
By keeping these five core folders clearly labeled and separated at the root level, moving your entire studio to a brand-new computer in the future becomes as simple as dragging one single master folder to a new drive.
Organizing Your Sample Library (Kits vs. Categories)
Sample collections tend to grow rapidly, turning into a digital swamp if left unchecked. There are two primary ways producers like to organize audio samples on disk:
By Pack / Vendor (The Vendor Method): Keeping sample packs in their original folder names (e.g., Cymatics - Essential Drums/, Splice - LoFi Beats/). This works best if you rely on smart standalone sample manager software to search your sounds.
By Sound Type (The Categorical Method): Sorting sounds into universal category folders (e.g., Drums/Kicks/, Drums/Snares/, Instruments/Guitars/). This works best if you browse samples directly inside your DAW's native file browser.
Find the workflow that works best with how your brain works, because there is no right or wrong answer here.
The Vendor Method
When you find yourself remembering go-to vendor packs for finding the samples you are looking for, then the Vendor Method may be a good way for you to organize your sample packs.
The easy part about this is that once a pack is installed inside your Sample Library folder, it is likely good to go for your workflow.
The problem here is when a pack is not named in a way that helps you remember what is in it or when there is a variety of different sounds contained within.
If you use a sample manager software, however, then you would normally not be digging through your Sample Library folder structure to find a song, which would make this method very smooth.
The Category Method
If you are like me and you find yourself looking for samples or instruments based on a particular sonic need, then the Category Method may work better for you to organize your collection of sounds. As I am working, if I was looking for a kick sound, I don't want to have to go through a stack of different vendor packs looking for kicks. That would be wasting time that I don't want to spend in that manner.
With the Category Method, it requires a bit of rearrangement of those sample packs by breaking them up into the kind of instrument groups and subgroups up front. But, once that is done, you can typically find what you are looking for pretty quickly.
If you are using a sample manager software, then this kind of organization may not be necessary, however.
If you prefer browsing natively in your DAW without third-party plugins, spend an afternoon sorting your favorite one-shots and loops into universal category folders. If you have a massive, multi-gigabyte sample collection, leave the vendor packs intact and use a dedicated sample manager tool instead.
Project Naming Conventions & Session Saving Protocols
Opening a folder filled with files named Beat_12_final, Beat_12_final_v2, and New_Song_real_final_3 is a recipe for confusion. A clean naming convention eliminates the guessing game.
The Version-Control Naming Template
Use a standardized naming structure whenever you start or save a new DAW session:
[SongName or WorkingTitle]_[BPM]_[Key]_[VersionState]
Early Demo: MidnightDrive_128_Am_v01_Idea
Arranged Track: MidnightDrive_128_Am_v03_Arrangement
Ready for Bouncing: MidnightDrive_128_Am_v06_MixReady
Whenever you make a major change to a session - like deleting a section, re-tracking vocals, or overhauling the drums - always use "Save As..." and increment the version number (v01, v02, v03). If you ever regret a creative decision, you can instantly revert back to yesterday's version without losing anything.
Some DAWs will have internal version controls, so definitely look into what is available to help you record the steps you are taking in your song-making process.
When I am working on a project from start-to-finish, I typically will separate the production, mixing, and mastering steps. During the production phase, I may take a previous idea and simply drag it further over to the right in my DAW session. Marking that section with a version number is another way to handle staged versions internally, if that fits your workflow.
The Non-Negotiable Rule: Collect All and Save
This is the single most important rule in digital music file management: Never leave samples referenced outside your project folder.
When you drag an audio sample into your DAW from a download folder, a thumb drive, or an external drive, many DAWs merely link to that file location rather than making a local copy. If you move or delete that sample later, your DAW project will break.
In Ableton Live: Always go to File > Collect All and Save.
In Logic Pro: Always select Save As... and ensure Audio Files is checked under project assets.
In FL Studio: Go to File > Export > Zipped Loop Package for long-term archiving.
This forces your DAW to copy every sample, vocal take, and impulse response directly inside that specific song's project folder, ensuring the project opens flawlessly years down the line.
This will take a little bit of extra hard drive space but save you tons of headaches when you end up opening a project down the road, especially if you have changed computers.
Top Tools to Manage and Tag Your Sample Collection
When you start grabbing some samples, life seems good. But fast-forward a year or two ahead and you end up with a sample library that has grown beyond a few gigabytes. At this point, manually sorting folders can take forever. Fortunately, dedicated software tools exist specifically to tag, key-detect, and audition samples instantly, and they can be a major time-saver.
Free & Standalone Sample Managers
ADSR Sample Manager (Free): A lightweight plugin and standalone app that automatically analyzes your local sample folders. It tags audio files by tempo, musical key, and instrument type, allowing you to audition sounds in sync with your DAW's playback.
Loopcloud (Freemium / Paid): Integrates your local sample collection with Loopmasters' cloud library, offering time-stretching, pitch-shifting, and instant auditioning directly inside your session before you commit to a sound.
AI & Smart Visual Sample Organizers
XLN Audio XO (Paid): Organizes all your drum one-shots into a visual 2D color-coded map based on sonic similarity. It allows you to swap drum hits on the fly and build custom drum kits instantly without clicking through nested folders.
Algonaut Atlas (Paid): Similar to XO, Atlas uses artificial intelligence to scan your sample folders and arrange your drum samples into a visual map, making kit creation effortless and visual.
The Bulletproof 3-2-1 Backup Strategy for Producers
If your music only exists in one location, it is waiting to be destroyed. That may sound harsh but ask anyone who has lost all their hard work as a song disappeared from the world when a hard drive crashed.
Professional producers rely on the 3-2-1 Backup Strategy:
3 Copies of Your Data: Your primary working drive, an on-site local backup, and an off-site cloud backup.
2 Different Media Types: Stored across different physical hardware (e.g., your laptop's internal NVMe SSD and a desktop external Hard Drive).
1 Copy Off-Site: Stored safely in the cloud to protect against physical disaster, theft, or hardware failure.
Setting Up Automated Cloud & Local Offsites
Local Automated Backups: Use built-in OS tools like Apple Time Machine (Mac) or File History (Windows) paired with an inexpensive desktop external hard drive. Plug it in and let it back up your working files hourly in the background.
Cloud Archiving Services: Set up a dedicated background cloud backup service such as Backblaze, Dropbox, or Google Drive. Backblaze is especially popular among producers because it offers unthrottled, unlimited cloud backups of internal and external drives for a low monthly fee.
Set these tools up once, let them run quietly in the background, and never stress about losing a song, preset, or sample again. Backing up your data can seem tedious, but it is a small "insurance policy" to prevent disaster from destroying your musical creations.
Frequently Asked Questions
Should I store my music sample library on an external SSD or an internal drive?
An external High-Speed NVMe SSD (connected via USB-C or Thunderbolt) is ideal for storing your sample library. An internal version, assuming your computer supports it, is even more amazing. Whether stored externally or internally on a dedicated drive, your samples won't consume space on your computer's core system drive. If you go the external route, you can plug the SSD into any secondary computer or laptop to access your entire library instantly.
What about virtual instruments - should I store those on an internal or external hard drive?
Virtual instruments, especially those that use lots of samples to work, will take longer to load if your hard drive transfer speed is slow. You can speed things up by using fast-transfer drives for your virtual instruments. However, only the instruments that you are using on a regular basis need to be on that fast-load setup. You can prioritize the locations of your 'go-to' instruments compared to your 'second string' virtual instruments, which could be on drives with a slower transfer rate.
How often should I back up my DAW projects and audio files?
Your local background backup (such as Apple Time Machine or Windows File History) should run hourly while you work. Your cloud backup service (such as Backblaze) should sync continuously in the background whenever your computer is connected to the internet.
If you are using a local backup server, because files for projects and samples add up over time, then it is a normal practice to back up those files daily, especially during times when you are sleeping and the computer is not in use.
What is the difference between "Saving" and "Collecting All and Save" in a DAW?
Standard saving merely updates the session file (.als, .CPR, .ptx), leaving recorded audio or imported samples linked to their original file locations on your disk. "Collect All and Save" (or your DAW's equivalent) forces the software to copy every external audio file directly inside the project folder itself, preventing "missing sample" errors if files are moved later.
Note that this will take up more hard drive space, but if you are moving project folders around or working between different computers, this can be very helpful.
Will moving my existing samples break my old DAW project files?
Yes, if your DAW relies on direct file paths. If you reorganize your sample folders on disk, older projects that used those samples may throw a "Missing Audio Files" alert the next time you open them. To fix this, simply point your DAW's automatic search tool to your newly organized master Sample_Library/ directory to re-index the files.
What happens if I move my virtual instrument sample folders?
If you move your virtual instruments sample folders because you are reorganizing them or shifting lesser-used instruments to a different hard drive location, you will typically need to reconnect their new location through the instrument database they use (Kontakt, for instance). For Kontakt instruments, just launch Native Access and then look for any instruments that are marked with a 'Repair' flag. Point those instruments to the new sample library folder location and Native Access will sync up the database so your instruments will work again.
Where to Go Next
Organizing your projects, files, and samples is one of the most effective ways to remove technical friction from your music-making. Once your folder structure and backup strategy are running on autopilot, you free up massive amounts of mental bandwidth to focus entirely on finishing tracks.
Now that you have your file structure organized and have a solid backup process, it's time to get into the creative side of things again:
Practice Drills & Creative Constraints: If you can practice not only with your DAW and related tools, but also with your creativity, your music-making workflow can become really strong.
Hopefully, after reading this article, you have seen the importance of being organized and how that will clear your mind to be in its creative flow state much easier when working on your songs.
After all of this technical talk, it might be a good time to take a song idea from start to finish. The 35-page Embervane Sparkflow Map is a free resource designed to help you do just that.
If you want to push into creating that next song, jump into our free MIDI Madness Tier 1 course.
Go protect and organize those files and then move on to making music!
Found this guide helpful?
Spread the word and share with another creator.
Return to How to Build a Productive Music Workflow Topic Hub
About the Author

Jim is the creator of Embervane - a lifelong music maker with a curiosity‑driven approach to creativity and learning. He has been playing drums since age nine and composing seriously since 2018, continually refining his craft through study, experimentation, and hands‑on practice.
With a background in chemistry and more than two decades of studying behavioral psychology, Jim brings a unique blend of scientific thinking and human understanding to music education. He beta‑tests tools for companies like Mastering the Mix, Kit Plugins, and Soundiron, which keeps him close to the evolving landscape of modern production.
Jim isn’t a celebrity producer or award‑winning engineer - he’s a creator who remembers exactly what it feels like to struggle, learn, and grow. His mission is to help other music makers build clarity, confidence, and momentum in their craft.
Jim is the creator of Embervane - a lifelong music maker with a curiosity‑driven approach to creativity and learning. He has been playing drums since age nine and composing seriously since 2018, continually refining his craft through study, experimentation, and hands‑on practice.
With a background in chemistry and more than two decades of studying behavioral psychology, Jim brings a unique blend of scientific thinking and human understanding to music education. He beta‑tests tools for companies like Mastering the Mix, Kit Plugins, and Soundiron, which keeps him close to the evolving landscape of modern production.
Jim isn’t a celebrity producer or award‑winning engineer - he’s a creator who remembers exactly what it feels like to struggle, learn, and grow. His mission is to help other music makers build clarity, confidence, and momentum in their craft.


©2026 Embervane LLC. All rights reserved. Embervane™ is a trademark of Embervane LLC.