
How to Choose the Right Space for Your Home Music Studio (Even in a Small Room)
Looks vs. Sound Quality: The Home Music Studio Illusion
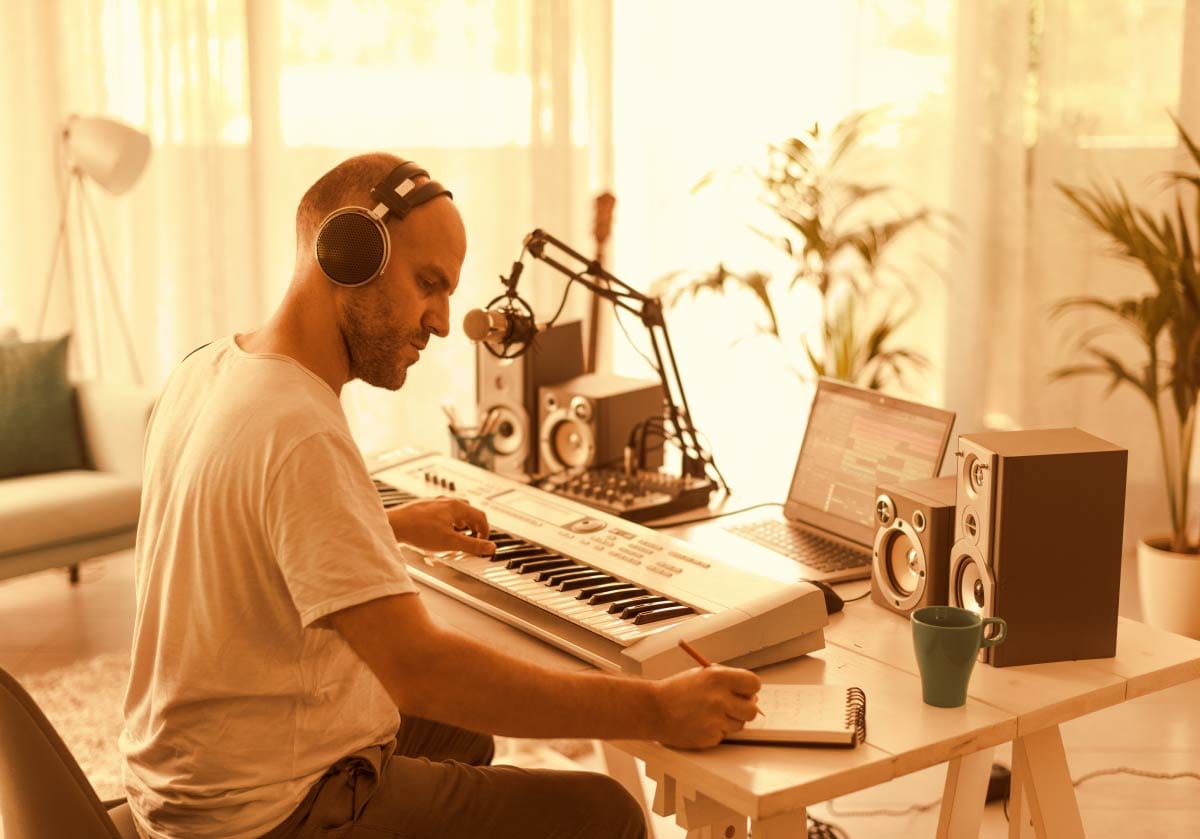
Scroll through social media or video streaming platforms, and you’ll see dozens of dream home production spaces: sleek wooden desks, warm LED strip lighting, aesthetic plant life, and pristine acoustic foam panels arranged in sharp geometric patterns. It’s easy to believe that building a great music space is mostly an aesthetic exercise - that as long as your gear looks high-end and your workspace looks inspiring, the music will follow.
Then you turn on your studio monitors, hit play on your latest mix, and run into a brick wall.
Your bass notes sound boomy and muddy in one spot, but completely vanish if you lean back six inches. Your vocals sound strangely boxy, as if they were recorded inside a plastic storage bin. And when you finally mix a track that sounds punchy and clear at your desk, you play it in your car or through your phone speaker only to realize the low end is completely distorted and the high frequencies are harsh enough to peel paint.
What happened? You fell into the classic home music studio trap: prioritizing how a space looks over how a space sounds.
The room you choose for your music space is the single most influential "plugin" in your signal chain. Before audio ever reaches your audio interface or gets converted into digital bits in your DAW, physical sound waves are bouncing off your walls, floor, and ceiling. If your room is actively working against you as you set up your home music studio, even a $5,000 pair of studio monitors won't save your mixes.
The good news? You don't need a dedicated multi-million-dollar tracking floor or custom-built floating rooms to make great records. You just need to know how sound behaves in residential spaces - and how to pick (and optimize) the best room available in your home, even if it’s a tiny spare bedroom.
In this guide, I’m going to walk you through how to select a room for your music production studio and also where to position your desk and speakers. Your room geometry and desk/speaker position can massively affect your sound quality.
Let's dig in!
Evaluating Room Size & Shape for a Home Music Studio
When evaluating potential rooms in your house or apartment, your first instinct might be to grab whatever space is left over. But taking a deliberate look at the volume and dimensions of your candidate rooms before moving heavy furniture will save you hundreds of hours of mixing frustration.
What is the Ideal Room Size for Your Music Studio?
In acoustic physics, volume is king. Larger rooms give sound waves - particularly long, low-frequency bass waves - more physical distance to travel and dissipate before hitting boundaries and reflecting back toward your ears.
Small Rooms (Under 100 sq. ft.)
These are the most common residential spaces (like a 9' x 10' bedroom or a converted walk-in closet). Small rooms present massive acoustic challenges because reflections hit your ears almost instantly, and low frequencies build up rapidly in the corners.
Medium Rooms (150 to 250 sq. ft.)
This is the sweet spot for most home music production setups (e.g., a 12' x 16' spare bedroom or home office). You have enough room to set up a proper monitor triangle, push your desk away from front walls, and introduce effective acoustic treatment.
Large Rooms (300+ sq. ft.)
Open basements or large living areas. While they can suffer from long reverb times, the extra space drastically reduces the effect of early reflections and standing waves, making it much easier to achieve an accurate listening environment.
If you are forced to work in a small room, don't lose heart. Millions of hit songs have been produced in converted bedrooms. The goal isn't to find a "perfect" room - it's to understand the physical limitations of your space so you can compensate for them.
A Note on Room Size & Shape
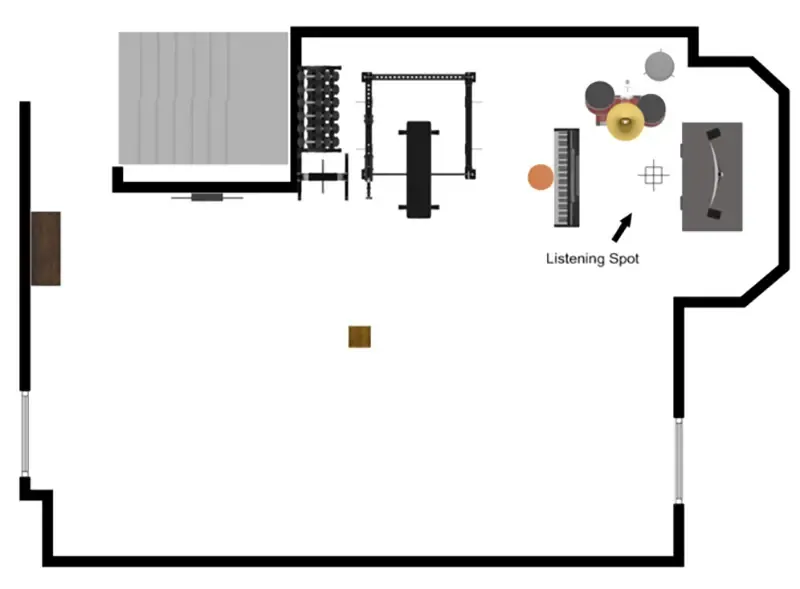
Sometimes, you don't have a 'best room' in the house for your music studio. My setup is in my basement. Is my room configured to the ideal 'magic' numbers for a "perfect" room? Absolutely not. Because of some use constraints, I am not at all located in what would be considered the ideal part of the oddly shaped room where I work. But that did not stop me from really dialing in the listening position with some solid work.
The nice thing about larger rooms is they can be more forgiving when it comes to sound energy and the listening position. The potential downside is that you will likely need more acoustic treatment than in a smaller room - each panel simply takes up less total volume when compared to the room as a whole in larger rooms.
Why You Should Avoid Perfectly Square Rooms
If there’s one room shape that will drive you crazy when setting up your music space, it’s a perfect square (like a 10' x10' bedroom).
Here’s the deal: every room has natural resonant frequencies called room modes. These are specific bass frequencies that bounce back and forth between parallel walls. In a rectangular room, the length, width, and height are all different, which spreads those resonances out somewhat evenly across the room.
Room modes cause certain frequencies to be either boosted or 'nulled' (lowered in volume). Want to test this out?
Head to an online tone generator and generate a lower frequency like 90 Hz. Then, walk around your room a little slowly and listen for volume differences. Dig this - you are effectively 'seeing' sound when you do this, but what you are hearing is the effect of room modes.
In a square room, the length and width are identical - that means that you get double the modal power crashing together as the exact same bass frequencies are bouncing off four walls simultaneously and colliding right in the middle of your space. Yeah - not cool.
When those waves collide, two frustrating things happen:
Extreme Bass Peaks: Certain low notes will sound unnaturally huge and boomy. You'll think your mix has way too much bass, so you’ll turn it down.
Deep Nulls (Disappearing Bass): Other low notes will completely cancel each other out. You’ll sit at your desk, hit a bass note, hear almost nothing, and turn the bass up to compensate.
The result? You end up making mix decisions based on a room lie. Your track sounds balanced at your desk, but the second you play it in your car, the low end is either totally nonexistent or a muddy mess.
If you have a choice between a square room and a rectangular room, always pick the rectangle. If you're stuck in a square room because it’s your only option, don't panic - just know that relying on a solid pair of headphones for your low-end mix decisions is going to save you a massive headache.
Do I know people that got a square room to work? Yes. Was it a tough journey where small adjustments could have larger shifts in volumes? Definitely. Just keep all that in mind.
Identifying and Avoiding External Noise Factors
A room can have decent dimensions, but if it sounds like a tarmac during rush hour or captures the rhythmic hum of your refrigerator, it’s going to compromise your recording takes. When picking your music room, you must evaluate both noise coming in (ambient noise) and noise going out (leakage into shared living areas).
Windows, HVAC, and Street Noise
Microphones - especially sensitive large-diaphragm condenser mics - don't have human brains. They can't "tune out" background noise the way your ears do. Before committing to a room, sit quietly in the space for five minutes with your eyes closed and listen for subtle noise sources:
Single-Pane Windows
Glass is an acoustic sieve. If your room faces a busy street, dog-park neighborhood, or construction zone, those external noises will ruin quiet vocal or acoustic guitar takes.
HVAC Vents & Air Handling
Central air conditioning ducts, furnace hums, and rattling vent covers are notorious sound killers. If possible, pick a room where you can easily toggle heating/cooling off during active recording passes.
Appliance Vibrations
Rooms directly above or adjacent to laundry rooms, garage door openers, or heavy kitchen appliances can transfer low-frequency mechanical thumps straight up through your mic stands.
Thin Walls and Shared Living Spaces
Home music production involves repetitive audio playback. Hearing the same 4-bar drum loop played 150 times while tweaking EQ settings can test the patience of housemates, family members, or downstairs neighbors.
Interior Hollow-Core Doors & Drywall
Standard residential interior walls consist of thin sheetrock over wooden studs with empty air in between. They offer almost zero structural sound isolation (soundproofing).
Mass is Mass
True sound isolation requires structural density (concrete, double-drywall assemblies, decoupled floors). Acoustic treatment on a wall will not stop bass or loud vocals from bleeding into the next room - absorbers only control internal room reflections.
(Pro Tip: Soundproofing is used to prevent sound from spilling from one room to another through a wall, floor, or ceiling. Acoustic Treatment absorbs or scatters the reflected sound only inside of your music room.)
If you know you will be producing late at night or living above sensitive neighbors, factor in whether you can comfortably monitor at modest volumes without causing friction.
Understanding Room Reflections and Early Echo
To make accurate mixing decisions, you need to hear the direct sound coming out of your studio monitor speakers - not the sound of your room bouncing back at you.
What are Acoustic Reflections (and Why Do They Ruin Mixes?)
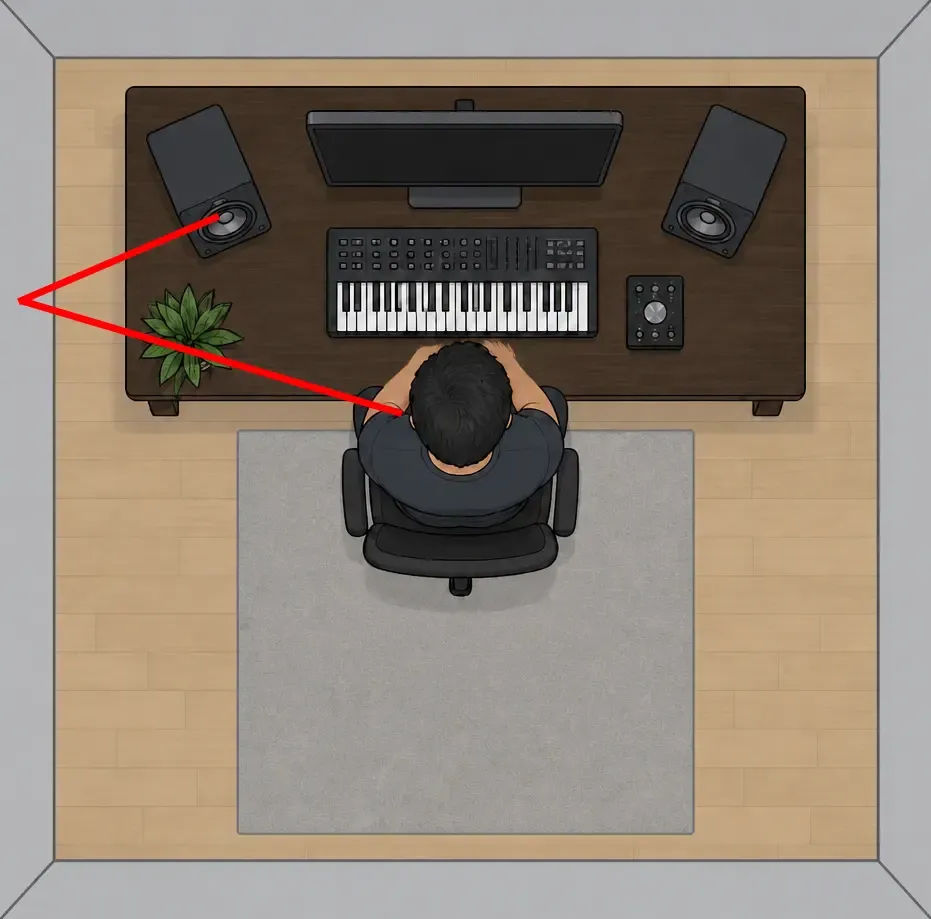
When sound shoots out from your speakers, it travels in a straight line toward your ears (Direct Sound). However, sound also spreads outward in a 360-degree sphere - especially lower and mid frequencies.
These secondary sound waves strike your side walls, ceiling, floor, and desk surface, bouncing off those hard boundaries and reaching your ears a few milliseconds after the direct signal (Reflected Sound).
When direct and reflected sound waves combine at your ears, they create an acoustic artifact known as comb filtering. Certain frequencies reinforce each other while others cancel out, creating a frequency response curve that looks like the teeth of a hair comb.
If your room is lying to you by boosting 200 Hz and dipping 4 kHz, you will naturally cut 200 Hz and boost 4 kHz in your DAW mix to compensate. The result? Your mix sounds thin and harsh everywhere else in the world.
Pinpointing Your Prime Reflection Spots
The most damaging reflections are early reflections (or primary reflections). These are the first hard surfaces sound bounces off before reaching your listening chair:
Front Walls: The wall that you face, which is closest to the speakers and can bounce high-energy sound waves back at your ears.
Side Walls: The points directly to your left and right between your head and the speakers.
The Ceiling: The hard surface directly above your desk and monitoring position. (If you are not using a desk, the floor can reflect sound in the same manner.)
Desk Surface / Computer Monitor: Depending on your desk and speaker position, the hard surfaces of your desk and/or computer monitor can reflect sound toward your ears.
The Back Wall: The wall directly behind your head, which bounces sound right back into the rear of your ears.
To find your primary front- and side-wall reflection points, use the classic Mirror Trick: Sit in your listening chair and have a friend slide a handheld mirror along the side wall at eye height. The exact spot where you see the reflection of your studio monitor speaker in the mirror is your primary reflection point - and that is where acoustic treatment belongs.
Best Music Studio Desk Placement in a Small Room
Once you’ve selected your room, where you place your desk inside that room will make or break your monitoring accuracy. Proper acoustic symmetry costs zero dollars and can instantly clean up your stereo image and frequency clarity.
The Long Wall Rule: Firing Down the Length of the Room
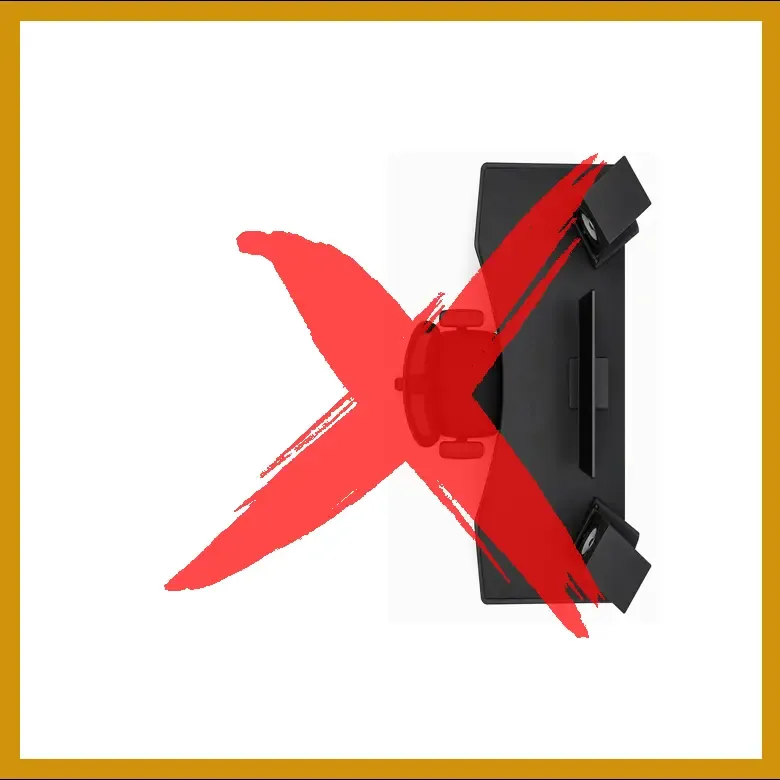
In a rectangular room, you should almost always set up your desk along one of the shorter walls, firing your studio monitors down the longest dimension of the room.
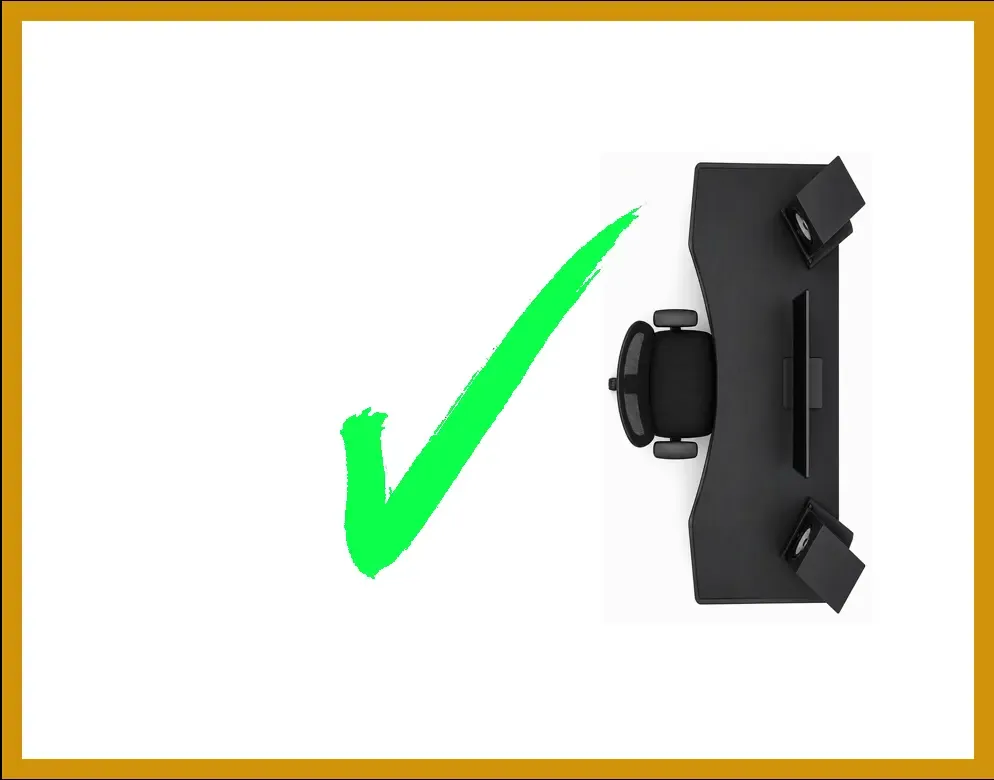
When your speakers fire down the longer axis of the room, reflected sound waves have to travel further before hitting the back wall and bouncing back toward your ears. This additional distance weakens the energy of the reflected wave, significantly reducing phase cancellation and comb filtering at your listening seat.
From a physics perspective, if the wall behind you is too close to the back of your head, the bass frequencies will stimulate axial modes in the room. That stimulation magnifies bigger modal peaks and deeper modal nulls. In addition, it can cause comb filtering around your listening position.
(Pro Tip: This is the challenge with bass in smaller rooms)
This is why the focus should be keeping a longer distance behind your desk position in the room - the energy of the sound will dissipate more and give your listening position more natural clarity.
Centering Your Setup Between Parallel Walls
Symmetry is vital for accurate stereo imaging. Position your desk dead-center between the left and right walls.
Equal Left/Right Distance: The distance from your left speaker to the left wall should exactly match the distance from your right speaker to the right wall.
Why Symmetry Matters: If your desk is tucked into a corner or pushed off-center, sound bouncing off the close side wall arrives at your ear faster and louder than sound from the far wall. This distorts your stereo balance, making it nearly impossible to set accurate pan positions, vocal levels, or spatial reverb tails.
Pro Tip [The Corner Trap]: Never place your desk in a corner. Room corners act as acoustic megaphones for low frequencies, creating severe bass buildup that completely corrupts what you hear.
The 38% Seating Rule for Studio Monitor Placement
Acousticians have identified an optimal starting position for listening in rectangular rooms: place your head roughly 38% of the way into the total length of the room, measured from the front wall.
Now, that kind of number is a little funky to estimate accurately in your head. But, with a tape measure and a calculator, you can figure out where a good starting point for your listening position is:
Calculate the 38% Mark
Measure the total length of your room from front wall to back wall. Multiply that length by 0.38. Place your head (the listening position) at that exact distance from the front wall.
For instance, if your the long measurement of your room is 12 feet, then multiply 12 feet x 0.38 = 4.6 feet. Measure 4.6 feet from the front wall and place a mark on the floor, because that is your starting listening position.
Form an Equilateral Triangle
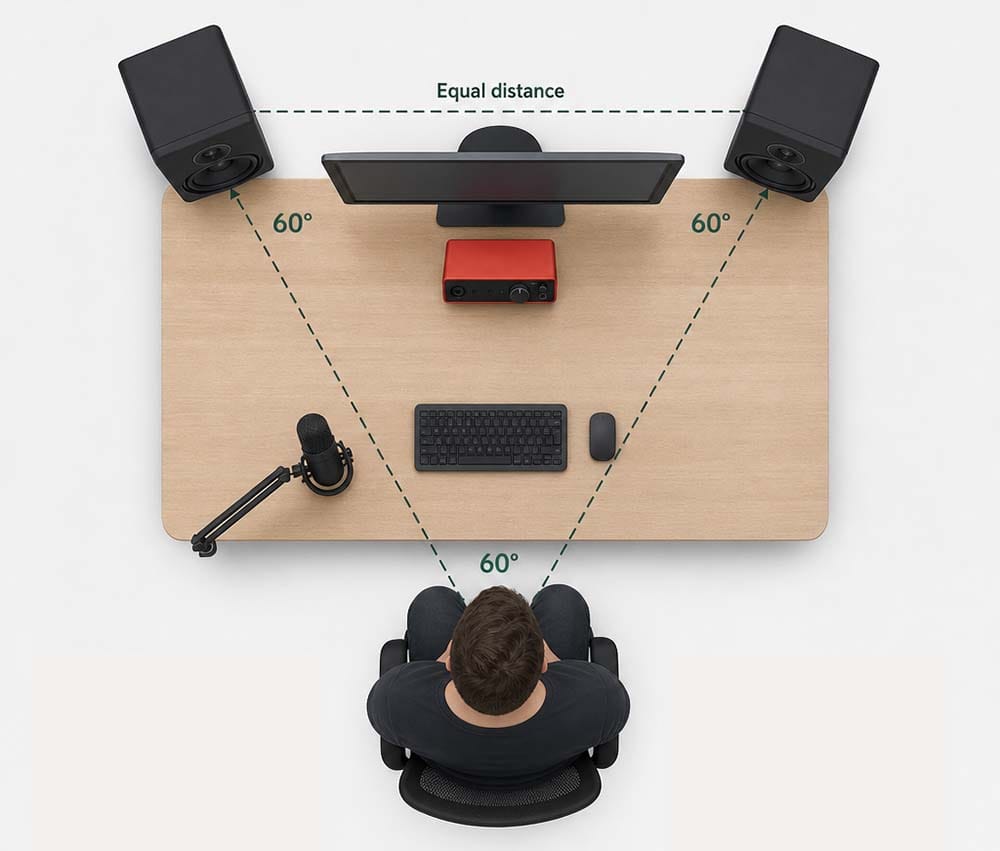
Position your studio monitors so they form an equal-sided triangle with your head. The distance between the left and right monitor tweeters should equal the distance from each tweeter to your ears.
You can use your handy tape measure to check this. And don't worry if this takes a little fiddling to get right - once it is in place then you likely won't have to move your speakers again.
Ear Level Alignment
Height matters. Adjust your speaker stands or desk isolation pads so the monitor tweeters sit at the exact height of your ears. Yeah - it does matter.
Oh, and by the way, don't tip your monitors so they are pointing up or down at your head. That messes with the sound you hear. Keep them nice and level with the floor unless the manual from the manufacturer says otherwise.
Frequently Asked Questions
Can I build a home music studio in a small bedroom?
Yes. A small bedroom can function effectively as a home music setup. To make it work, position your desk along the long wall, keep your speakers out of corners, center your setup between side walls, and use monitor isolation pads. If low-end issues persist in a small bedroom space, mixing primarily on open-back headphones and using monitors for casual listening is a reliable solution.
What if I am using headphones instead of studio monitors?
If you are using headphones to work instead of speakers, then you can essentially break every rule when it comes to desk location, room size, room geometry, acoustic treatment, etc. You are in your own world, man - and all this stuff doesn't apply. In fact, this is the recommended starting point, especially if you have room challenges that would make using studio monitors challenging.
Is a garage or basement better for a music studio?
Basements and garages offer excellent isolation from street noise and household activity thanks to dense concrete construction. However, untreated concrete walls create harsh high-frequency reflections and intense low-end buildup. Additionally, basements and garages require careful moisture management, humidity control, and heating/cooling setups to protect electronic gear and instruments.
Where to Go Next
When it comes to selecting your music production room and positioning your desk, the good thing is that you do that once and then lock it in and move on. This sets a strong foundation for your home music studio. By aligning your setup with the physics of your room rather than fighting against this, you eliminate guesswork and build a listening environment you can trust.
Once your desk and monitors are centered, firing down the long wall, and positioned at the 38% mark, your next logical step is controlling the sound waves bouncing around your room. And that brings us to the world of acoustic treatment.
Before you jump into absorber panels and the like, it might be a good time to take a creative break and go work on a song for a while. And to help support that, simply grab the Embervane Sparkflow Map - a 35-page, step-by-step guide that takes you from the spark of your idea to a finished song all for free.
And when you're ready to up your MIDI instrumentation game, jump straight into our free MIDI Madness Tier 1 course.
Now go bring a musical idea to life!
Found this guide helpful?
Spread the word and share with another creator.
About the Author

Jim is the creator of Embervane - a lifelong music maker with a curiosity‑driven approach to creativity and learning. He has been playing drums since age nine and composing seriously since 2018, continually refining his craft through study, experimentation, and hands‑on practice.
With a background in chemistry and more than two decades of studying behavioral psychology, Jim brings a unique blend of scientific thinking and human understanding to music education. He beta‑tests tools for companies like Mastering the Mix, Kit Plugins, and Soundiron, which keeps him close to the evolving landscape of modern production.
Jim isn’t a celebrity producer or award‑winning engineer - he’s a creator who remembers exactly what it feels like to struggle, learn, and grow. His mission is to help other music makers build clarity, confidence, and momentum in their craft.
Jim is the creator of Embervane - a lifelong music maker with a curiosity‑driven approach to creativity and learning. He has been playing drums since age nine and composing seriously since 2018, continually refining his craft through study, experimentation, and hands‑on practice.
With a background in chemistry and more than two decades of studying behavioral psychology, Jim brings a unique blend of scientific thinking and human understanding to music education. He beta‑tests tools for companies like Mastering the Mix, Kit Plugins, and Soundiron, which keeps him close to the evolving landscape of modern production.
Jim isn’t a celebrity producer or award‑winning engineer - he’s a creator who remembers exactly what it feels like to struggle, learn, and grow. His mission is to help other music makers build clarity, confidence, and momentum in their craft.


©2026 Embervane LLC. All rights reserved. Embervane™ is a trademark of Embervane LLC.