
How to Build a Home Music Studio on Any Budget: $0 to $3,000+ (Realistic Gear Tiers)
The Price is Right!
If you ask ten different music producers how much a home studio costs, you’ll get ten wildly different answers. One person will tell you that you can’t make real music without $5,000 in treated acoustics and boutique preamps, while a teenager on TikTok just produced a chart-topping hit using stock iPhone earbuds and a free app.
The truth? A modern home studio costs as much or as little as your current musical goals require.
The biggest mistake beginners make isn't spending too little - it's spending money on the wrong things at the wrong time. Buying a $400 condenser microphone when you don't own an audio interface, or dropping $800 on studio monitors in an untreated, reflective bedroom, wastes cash that could have gone toward tools that actually fix workflow friction.
When we set up our home studios without wasting money, that means making smart purchases that actually move the needle for our music workflow so we can finish more songs.
To help you set up your home studio without wasting money, I’ve broken down realistic equipment budgets into six distinct tiers - ranging from a $0 setup using gear you already own all the way up to a semi-pro $3,000+ environment.
Let's go "shopping!"
The 6 Realistic Home Studio Budget Tiers
Note that each of these tiers gives representative examples of the gear you can use. Your own situation may result in adjustments to these baseline levels - like if you had no plans for recording so you skip the microphone recommendation, etc.
A Note on Software & Plugins vs. Hardware: You’ll notice the tier budgets below focus primarily on physical studio hardware (interfaces, monitoring, microphones, and room treatment). This is intentional.
Virtually every modern DAW (Ableton, Logic, Studio One, Reaper, FL Studio) comes stocked with high-grade native plugins - EQs, compressors, delays, and synths - that are more than capable of producing professional, commercial-ready mixes. Early on, your funds are far better spent on accurate hardware monitoring that lets you hear what you’re doing, rather than collecting third-party software plugins you don't yet need at this point.
Tier 0 - The $0 Setup (Free Music Production)
Core Gear: Computer or laptop you already own, earbuds/standard headphones, free DAW (Digital Audio Workstation), stock plugins, built-in computer/phone microphone.
Purpose: Try music production and test your commitment before spending a single dollar.
You do not need to buy external hardware to start making music on a computer. If you have a functioning computer, you already have access to world-class software. Free DAWs like GarageBand (Mac), Waveform Free, or Reaper (free trial) give you access to unlimited MIDI tracks, virtual instruments, and editing tools.
Use standard consumer headphones or earbuds to arrange beats, tweak software synths, and learn basic mixing logic. If you need to record rough vocal ideas or acoustic guitar sketches, use the voice memo app on your phone or your computer’s built-in microphone. Master the software mechanics first - gear can wait.
Tier 1 - The $250 Setup (Vocal & Podcast Starter)
Core Gear: Quality USB microphone (with built-in headphone monitoring), an economical but decent pair of headphones (e.g., Audio-Technica ATH-M20x), free DAW, optional mini MIDI controller.
Purpose: Record clean vocals, podcasts, or simple acoustic demos with minimal technical complexity.
When you are ready to make your first physical upgrade, skip the cheap studio bundles and pick up a direct-to-USB microphone. Modern USB mics contain internal preamps and digital converters, allowing you to plug directly into your computer without buying a separate audio interface.
Pairing a USB mic with a decent pair of closed-back studio headphones allows you to track vocals or acoustic instruments cleanly without audio leaking from your speakers back into the microphone. It’s a lean, portable setup ideal for singer-songwriters and vocalists starting out on a tight budget.
Tier 2 - The $500 Setup (The True Beginner Recording Studio)
Core Gear: Entry-level 2x2 audio interface (e.g., Focusrite Scarlett Solo or MOTU M2), entry-level XLR dynamic or condenser microphone, an economical but decent pair of headphones (e.g., AKG K240 or ATH-M40x), 25-key MIDI controller (e.g., Arturia Microlab or Novation Launchkey Mini).
Purpose: Build a legitimate home recording studio with proper signal chains and tactile controls.
The $500 mark is the true sweet spot for building a functional, expandable home studio. This is where you make the critical jump from a USB microphone to a dedicated budget audio interface and XLR microphone.
An audio interface gives you high-quality preamps, physical gain knobs, dedicated headphone volume controls, and ultra-low latency monitoring. Adding a compact 25-key MIDI controller introduces velocity-sensitive keys and drum pads, making it infinitely faster to perform synth melodies and lay down drum patterns than drawing notes in with a mouse.
If you don't plan on using a mic to record, then those funds can be put into boosting the quality of your studio headphones or perhaps to purchase a solid synthesizer or virtual instrument.
Tier 3 - The $1,000 Setup (The Versatile Home Production Studio)
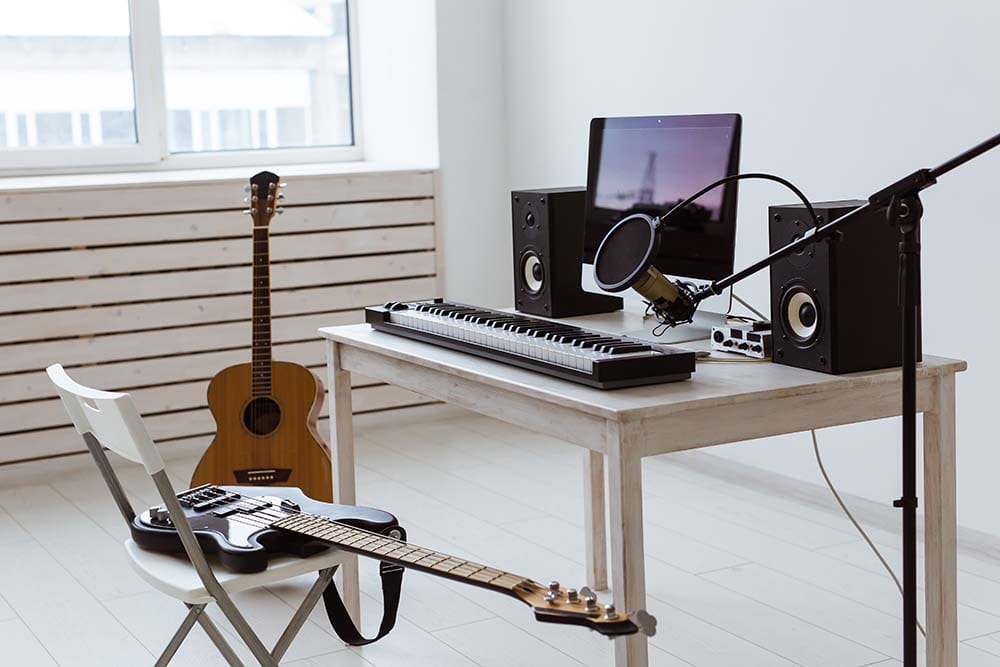
Core Gear: Upgraded 2-channel audio interface (e.g., Audient iD14 or SSL 2+), entry-level budget studio monitors (e.g., Kali Audio LP-UNi, JBL 305P MKII, or ADAM Audio T5V), studio headphones, versatile XLR microphone, 49-key MIDI controller, basic acoustic treatment (2–4 DIY broadband absorption panels).
Purpose: Create a well-rounded production environment capable of serious mixing and tracking.
Crossing the $1,000 threshold allows you to pivot from working exclusively on headphones to mixing in open space. Adding a pair of 5-inch studio monitors gives you an accurate physical stereo field and realistic depth perception.
However, monitors are only as good as the room they sit in. At this budget, reserve $150–$200 to build or buy basic broadband acoustic panels for your first reflection points (the front and side walls directly adjacent to your desk are easy targets). Pairing entry-level monitors with targeted acoustic control transforms how your mixes translate to outside speakers.
Tier 4 - The $2,000 Setup (Semi-Pro Monitoring & Capture)
Core Gear: Mid-range studio monitors (e.g., Focal Alpha 65 EVO or ADAM Audio A4V), mid-range vocal microphone (e.g., Roswell Mini K47 or Shure SM7B), expanded audio interface, 49- or 61-key MIDI controller, comprehensive room treatment (first reflections + corner bass traps).
Purpose: Build a high-performance semi-pro studio with precise monitoring accuracy.
At $2,000, every component in your signal path reaches a professional threshold. You move from entry-level monitors to mid-range active monitors that deliver tighter transient response, extended low-end accuracy, and lower distortion at high volumes.
You also expand your acoustic treatment to include thick corner bass absorbers. Taming room modes in the low frequencies (80Hz–250Hz) allows you to make confident bass and kick drum decisions without constantly second-guessing your sound on test speakers.
Tier 5 - The $3,000+ Setup (Near Pro-Level Performance)
Core Gear: High-end studio monitors with room correction DSP (e.g., IK Multimedia iLoud MTM MKII or ADAM Audio A7V), premium audio interface (e.g., Universal Audio Apollo Twin or Antelope Zen Tour), premium vocal mic, open-back mixing headphones (e.g., Sennheiser HD 600), complete acoustic treatment kit, specialized control surfaces.
Purpose: Achieve near-commercial studio translation and ultra-low latency tracking.
A $3,000+ home studio environment eliminates technical compromises. At this level, high-end interfaces feature onboard DSP processing, letting you run vintage-modeled plugin chains in real-time with zero latency during vocal capture.
Pairing professional monitors with built-in digital room correction software (like ARC Studio or Sonarworks) ensures that what you hear at your desk is as accurate as possible. You aren't just buying gear to show off; you are building an acoustic environment that allows you to mix fast and deliver radio-ready masters.
Essential Upgrades: What to Prioritize on Any Budget
Regardless of whether you have $250 or $3,000 to spend, always allocate your funds toward these three pillars first:
Accurate Monitoring First
You cannot fix what you cannot hear. One part of hearing well is training your ears and the other is to prioritize one great monitoring source - either a high-quality pair of headphones early on or studio monitors paired with basic acoustic treatment later - over buying fancy outboard hardware.
Clean Audio Capture
If you record live vocals or acoustic instruments, prioritize a quiet interface preamp and a solid XLR microphone. Capturing clean, uncolored audio at the source saves dozens of hours of repair work in post-production.
(Pro Tip: Almost every modern audio interface records cleanly, so the mic becomes a more critical element here.)
Workflow Speed & Simplicity
Buy gear that eliminates mechanical friction. A simple MIDI controller that lets you perform parts in real time keeps your brain in a creative flow state far better than clicking a computer mouse. As you keep finishing songs, these points of friction will become more and more obvious.
Money Traps: What to Skip Early On
When building a budget home studio setup, it’s easy to get distracted by flashy gear that adds complexity without improving your sound. Here is what you can safely skip when you are starting out:
Hardware Outboard Gear
Analog compressors, hardware EQs, and outboard channel strips look cool on a desk, but modern DAW stock plugins sound incredible. Master digital processing before spending money on hardware.
Subwoofers
Adding a subwoofer to an untreated home room creates muddy, uncontrolled low-end buildup that ruins your mixes. Use a good pair of studio headphones to verify sub-bass instead before adding this extra speaker element.
Expensive Third-Party Plugins
Your DAW comes packed with world-class EQs, compressors, delays, and reverbs. Learn your DAW's native plugins inside and out before buying third-party plugin bundles. Build the skills first - you will make far better buying decisions later.
Oversized Keyboards
Don't buy a massive 88-key weighted piano controller if you only use it to tap in synth basslines and trigger drum samples. Match your keyboard size to your actual playing ability. If you have only ever played a full piano, then an 88-key rig might be your style, but otherwise, keep it more efficient to start.
Frequently Asked Questions
What is the absolute minimum budget needed to build a home studio?
The absolute minimum budget is $0. If you already own a laptop or desktop computer, you can download free production software (like GarageBand or Waveform Free) and start producing music immediately using standard headphones and stock virtual instruments.
Is it better to buy a USB microphone or an audio interface with an XLR mic?
If you only plan to record spoken word podcasts or simple vocal demos on a tight budget, a USB microphone ($70–$150) is fine. However, if you want to produce music long-term, investing in an audio interface with an XLR microphone provides far better sound quality, expandable inputs, and lower latency.
Should I buy studio monitors or high-end headphones first?
If you are working in an untreated room or on a budget under $500, buy a great pair of studio headphones first. Entry-level studio monitors placed in an untreated room with bare walls will trick your ears, whereas headphones deliver consistent, room-independent sound. A great example of a one-and-done headphone set are the Ollo mixing cans.
How much should I set aside for acoustic treatment?
A good rule of thumb is to set aside 15% to 20% of your total studio budget for acoustic treatment once you buy studio monitors. Even $150 spent on DIY broadband absorption panels will yield a bigger improvement in mix translation than spending an extra $150 on more expensive speakers. How much can you spend? Lots, especially when purchasing treatment from retailers. But once that treatment is in place and your room is tuned up, you're done with treatment.
Where to Go Next
Building a home studio isn't about accumulating impressive piles of gear - it's about systematically assembling a lean, reliable setup that lets your ideas move from your head into your DAW with zero friction.
Now that you know how to map your budget across these six gear tiers, here are your next steps to keep your momentum going:
Expand Intentionality: If you already have a working setup and want to know when to make your next purchase, check out our guide on how to expand your home studio over time without upgrading too soon.
Avoid Costly Mistakes: Learn which popular studio items actively waste your money by reading our breakdown of common home studio money traps.
Don't let waiting for "better gear" become an excuse to delay making music. You have more than enough tools available right now to write, produce, and finish great tracks. If you're feeling stuck in the cycle of starting projects but struggling to finish them, grab the free Embervane Sparkflow Map. This 35-page step-by-step framework guides you through the entire production pipeline so you can beat creative fatigue and finish your songs.
If you want to push into creating that next song, jump into our free MIDI Madness Tier 1 course.
Make those purchases intelligent and go rock your studio to make some great music!
Found this guide helpful?
Spread the word and share with another creator.
Return to Set Up Your Home Studio Without Wasting Money Topic Hub
About the Author

Jim is the creator of Embervane - a lifelong music maker with a curiosity‑driven approach to creativity and learning. He has been playing drums since age nine and composing seriously since 2018, continually refining his craft through study, experimentation, and hands‑on practice.
With a background in chemistry and more than two decades of studying behavioral psychology, Jim brings a unique blend of scientific thinking and human understanding to music education. He beta‑tests tools for companies like Mastering the Mix, Kit Plugins, and Soundiron, which keeps him close to the evolving landscape of modern production.
Jim isn’t a celebrity producer or award‑winning engineer - he’s a creator who remembers exactly what it feels like to struggle, learn, and grow. His mission is to help other music makers build clarity, confidence, and momentum in their craft.
Jim is the creator of Embervane - a lifelong music maker with a curiosity‑driven approach to creativity and learning. He has been playing drums since age nine and composing seriously since 2018, continually refining his craft through study, experimentation, and hands‑on practice.
With a background in chemistry and more than two decades of studying behavioral psychology, Jim brings a unique blend of scientific thinking and human understanding to music education. He beta‑tests tools for companies like Mastering the Mix, Kit Plugins, and Soundiron, which keeps him close to the evolving landscape of modern production.
Jim isn’t a celebrity producer or award‑winning engineer - he’s a creator who remembers exactly what it feels like to struggle, learn, and grow. His mission is to help other music makers build clarity, confidence, and momentum in their craft.


©2026 Embervane LLC. All rights reserved. Embervane™ is a trademark of Embervane LLC.